As you may already aware, traditional file reader is not supported in IFS Cloud and only works for Op-Prem installations. This leads most IFS admins and consultants to think that the only option available to import files into IFS Cloud is by setting up a (S)FTP reader. Setting up a SFTP for IFS Cloud is not an easy task due to the requirements such as it needs to be publicly available for IFS Cloud to access and SSL/authentication failures, therefore many are struggling to set this correctly.
This blog post describes an alternate approach to import files from a local PC into IFS Cloud by using IFS SOAP Gateway and Microsoft Power Automate. I hope this could be good starting point for those who are trying to utilize Microsoft Power Platform capabilities with IFS Cloud as well.
In this Post…
This post guides through the steps needed in IFS to connect a 3rd party system to the SOAP Gateway with proper authentication and create a simple Power Automate flow to read files from a OneDrive folder, send them to IFS, and then move the sent file into a different folder. The same concept can be used to read files from SharePoint, email, Dropbox, or any other source where it’s possible to make a connection using the Power Platform.
Content
- Content
- IFS SOAP Gateway
- Microsoft Power Automate
- Setting up IAM Client in IFS
- Configuring the Power Automate Flow
- Testing
- Conclusion
IFS SOAP Gateway
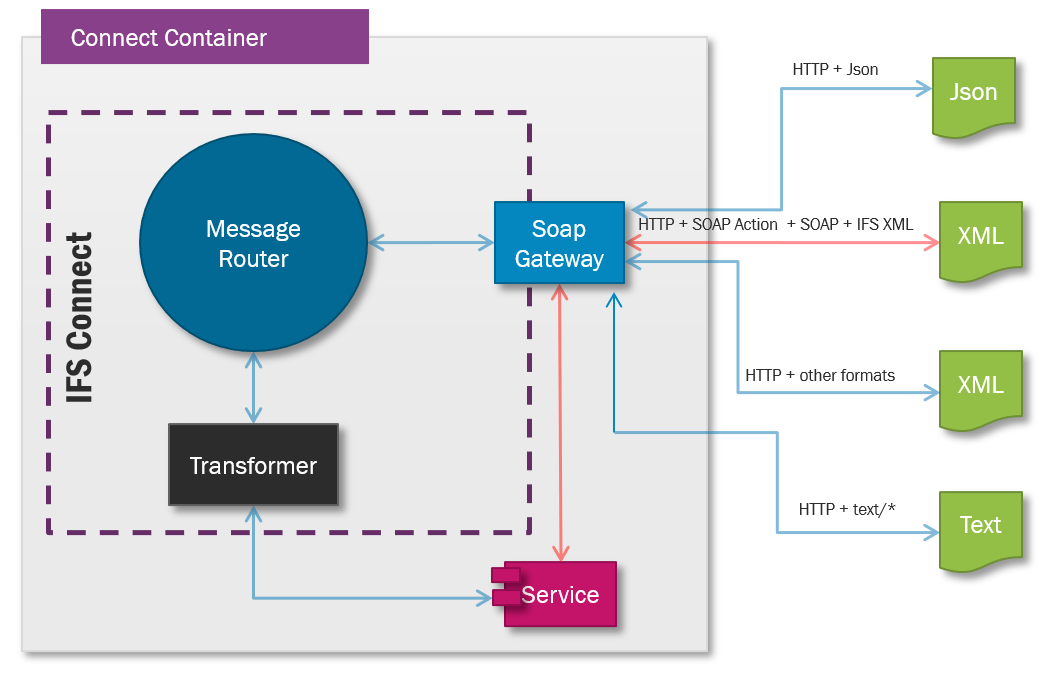
IFS SOAP Gateway is a part of IFS Connect and can used to load XML, JSON or any text formatted file to IFS Connect. When a file is sent in a HTTP request body reaches the IFS SOAP Gateway, it will end up as an application message and then you can create routing rules, routing addresses to process it just like the file is loaded via a file or a (s)ftp reader. Many are under the impression that the IFS SOAP gateway supports only SOAP based XMLs, but it accepts any XML, Json or text formatted files in addition to SOAP formatter messages in IFS Cloud.
In Apps 10 or earlier versions, it was only possible to send XML formatted files using SOAP Gateway and it's a nice improvement IFS has done by enabling other file formats than XML in IFS Cloud, but keeping the traditional name SOAP gateway is a good camouflage for this great feature 😉.
Microsoft Power Automate
Power Automate is part of Microsoft’s Power Platform, which includes Power BI, Power Apps, and Power Virtual Agents. It allows users to create automated workflows, also known as “flows,” by connecting a wide range of apps, including Microsoft’s own tools (e.g., SharePoint, Teams, Outlook, OneDrive) as well as third-party services. The platform’s low-code interface empowers users to define triggers, actions, and conditions for their workflows, making automation accessible to both technical and non-technical users.
Some of the power automate capabilities are included in the Office 365 license but you need a Premium license to get the full potential of the platform. More about what’s included in Office 365 license holders can be found here. If you don’t have a Premium license, it’s possible to get a trial license easily.
To complete the setup in this post, we need to use the HTTP connector which requires Premium license. Please check you have the correct license or obtain a trial license before continue.
Setting up IAM Client in IFS
In order to connect to IFS Cloud using a 3rd party application or a service, it needs a valid OAuth2 token. For the integrations, best practice is to use the client credential flow. If you are new to IFS Cloud and the REST API authentication, read the previous post Authentication in IFS Cloud for detailed explanation on this topic. First step of this is to setup the IAM client and the a service account with proper permission.
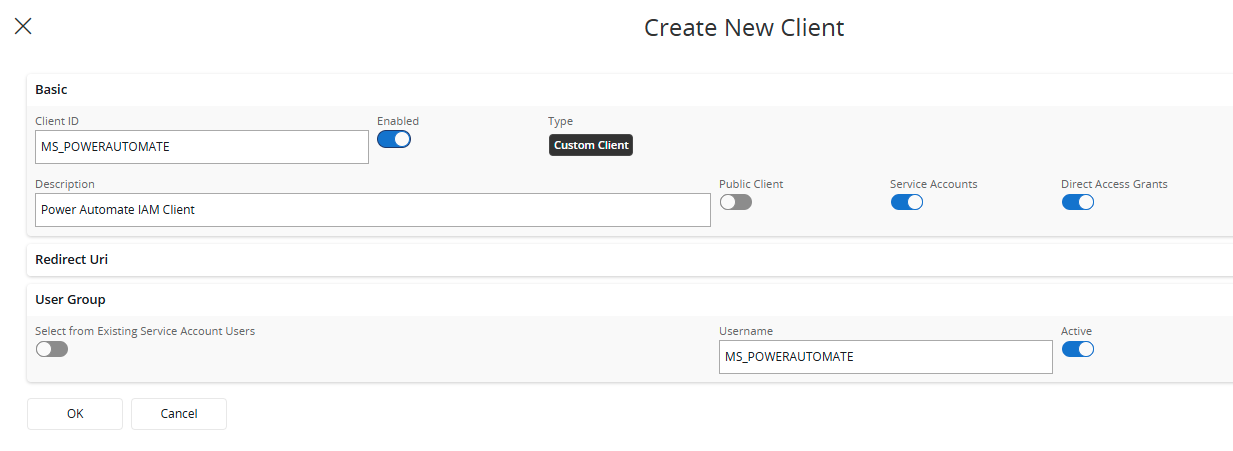
Navigate to the IAM Client Details page in IFS Cloud and create a new client. Set the Service account checkbox on, and in provide a new user name to be set as the service user as shown below. After saving, Navigate to the IAM Client page and copy the client secret. We will need that in a later step.
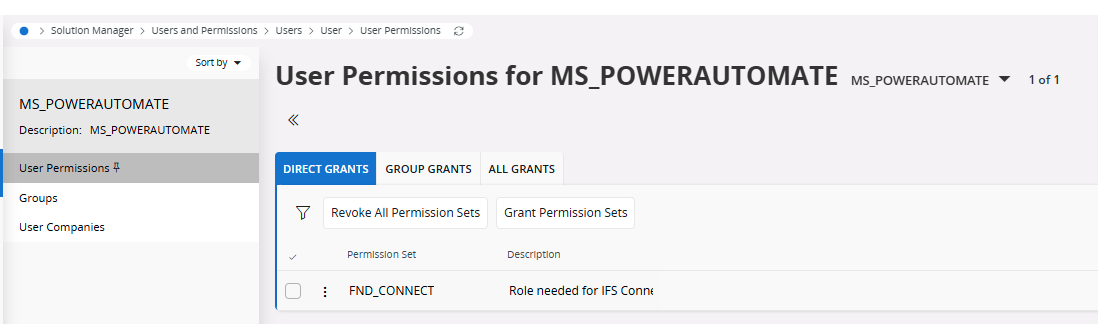
This will cerate an IAM client and a IFS service user account which we can add the necessary permission grants. In order to access the IFS Soap Gateway, a user needs to have the built in permission set FND_CONNECT. Navigate to the User > User Permissions, search the username created above and grant the FND_CONNECT permission set to the user.
Configuring the Power Automate Flow
1. Setting up the OneDrive Floders
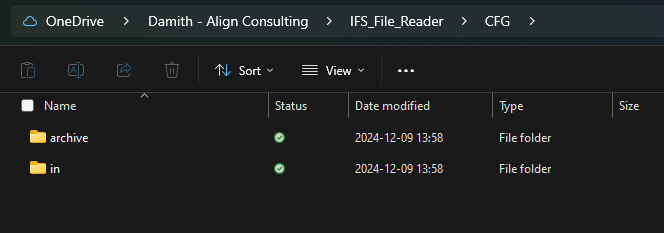
Before moving into the Power Automate, we need to create OneDrive folder to put files which will be sent to IFS Cloud. I’m using OneDrive for Business and setup below folder structure but it can be any naming you’d like. Purpose of the archive folder is to move the files from in folder after they sent to IFS.
2. Start Creating the Power Automate Flow
Navigate to https://make.powerautomate.com/ and login with your credentials.
It's possible to create Power Automate environments for manage and share flows. Please check Microsoft documentation for more details on how to use environments in a proper way.
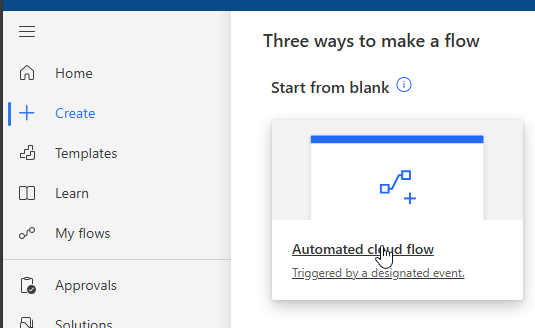
On the Dashboard, click + Create to create a new flow and choose Start from blank, and use the Automated Cloud Flow option.
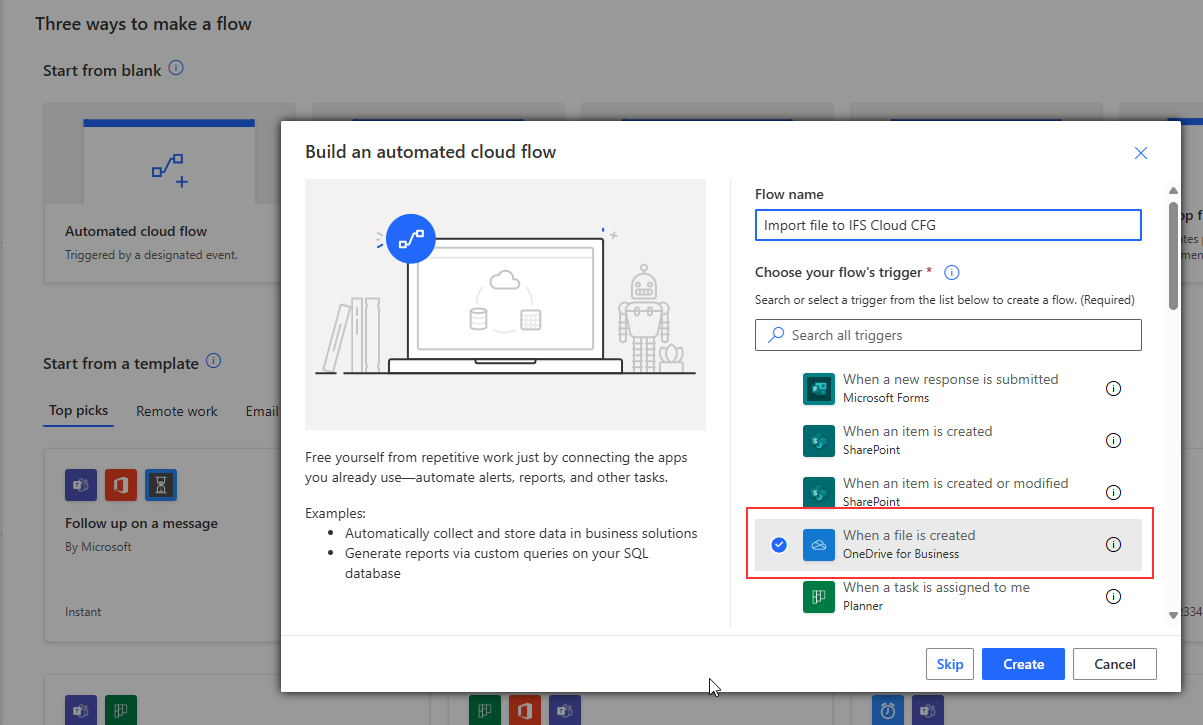
Name your flow and from the triggers, use When a file is created trigger for OneDrive for Business.
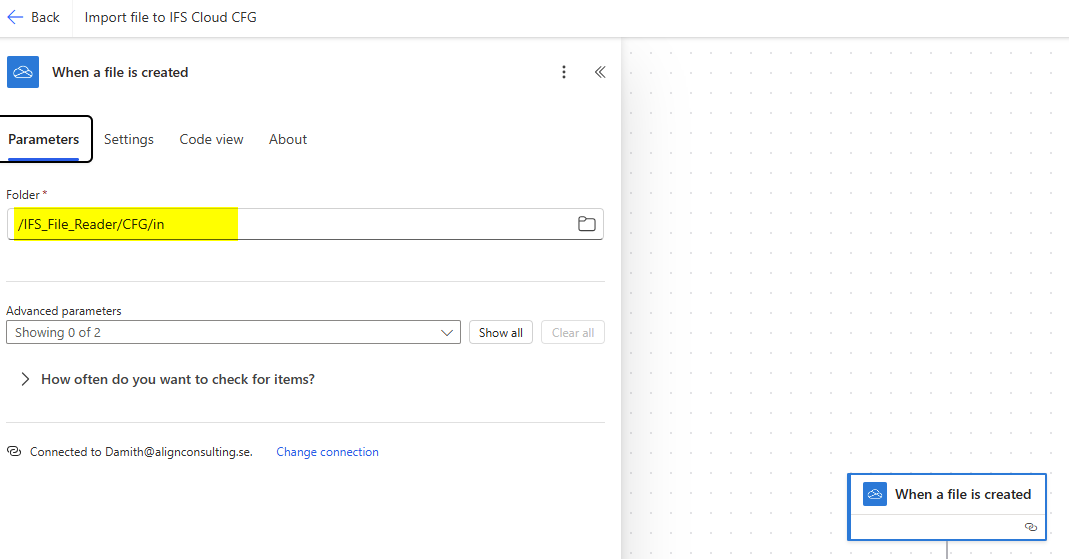
In the designer, browse the folder created. If you have multiple Microsoft accounts, make sure you are connected to the correct account.
3. Fetching the Access Token from IFS
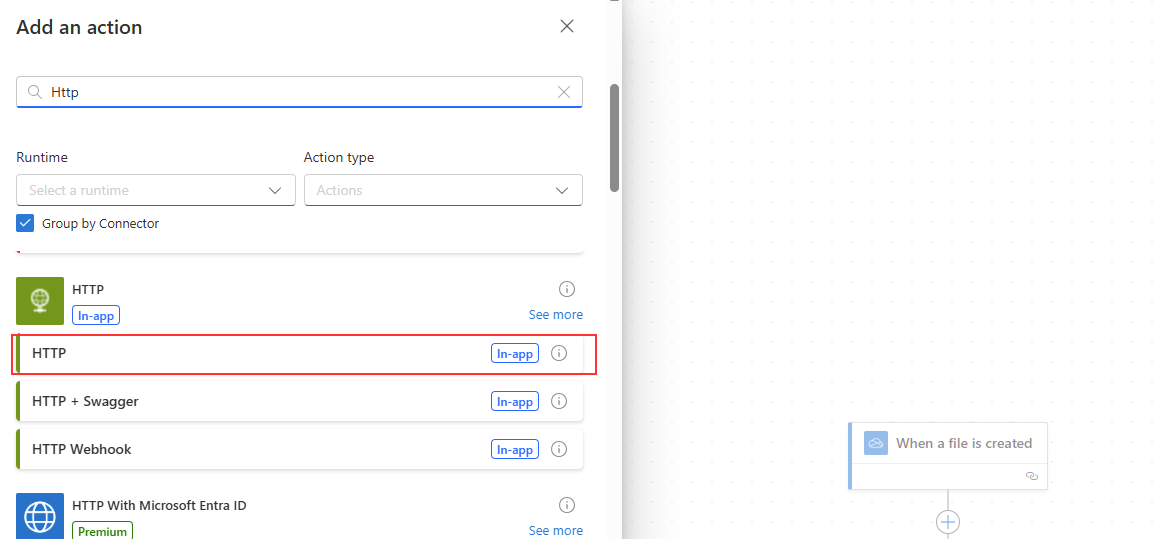
Before sending the file to SOAP Gateway, we need to fetch an access token from IFS, and use it in the request. Press + after the trigger to add a new action and search for HTTP.
Set the parameters as follows
- URL: Token Endpoint. Check the OpenID configurations of the IFS environment on how to find the correct token endpoint
- Method: POST
- Headers: Add the Content Type Header Content-Type = application/x-www-form-urlencoded
- Body: Choose expression and add the following. replace the CLIENT_SECRET value with the secret copied when creating the IAM client.
concat('grant_type=', encodeUriComponent('client_credentials'),
       '&scope=', encodeUriComponent('openid'),
       '&client_id=', encodeUriComponent('MS_POWERAUTOMATE'),
	   '&client_secret=', encodeUriComponent('CLIENT_SECRET'))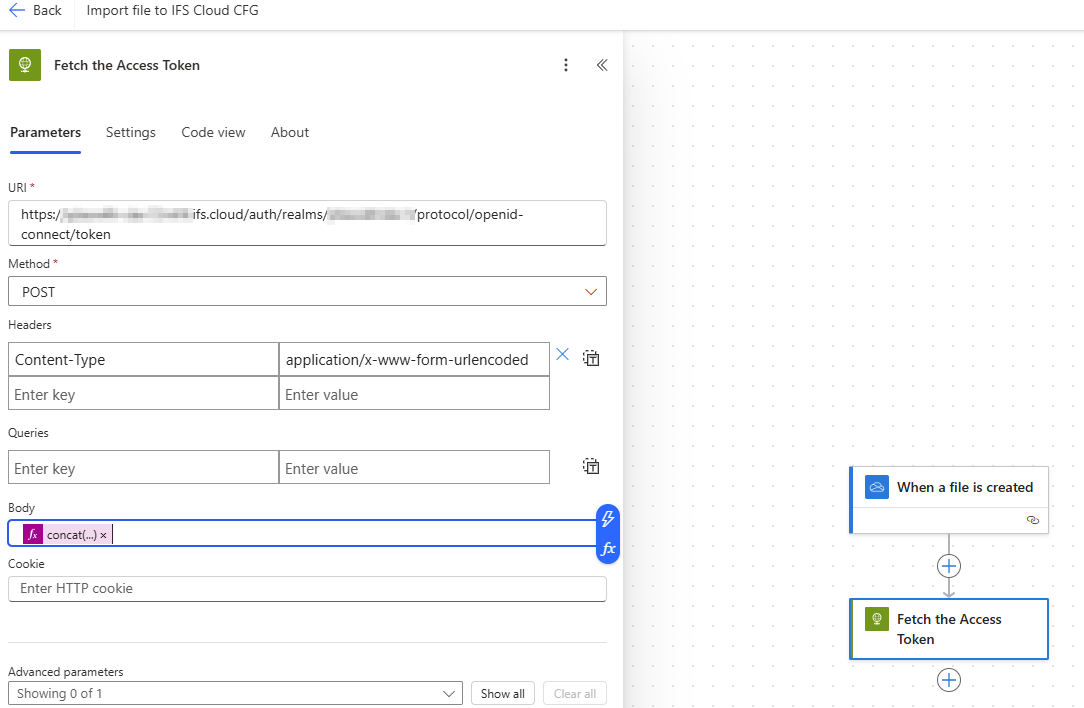
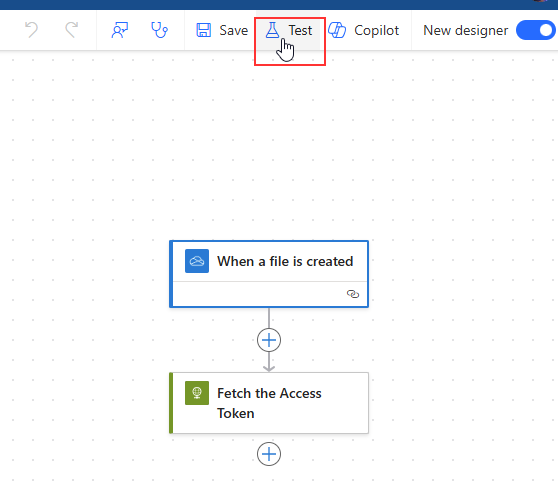
Once you setup the flow up to this step, it’s time to test it if it’s working. Use the Test button to start testing and use to trigger Manually.
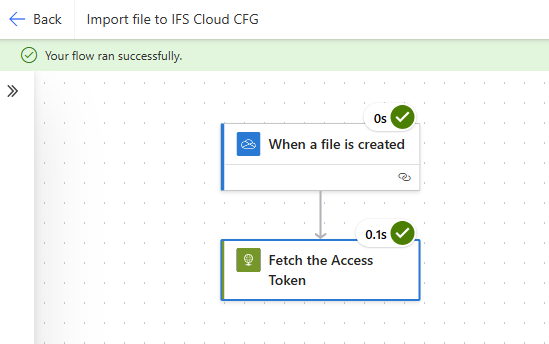
Place a file in the /in folder in the OneDrive location. If everything is okay, both the steps should be succeed. Check the output from each step and verify the results.
Copy the output JSON response from the access token request since we need it in the next step. Output from the access token request should be similar to following.
{
"access_token": "eyJhbGciO.....",
"expires_in": 3600,
"refresh_expires_in": 7200,
"refresh_token": "eyJhbGciO.....",
"token_type": "Bearer",
"id_token": "eyJhbGciOi.....": 0,
"session_state": "d97f732c-c881-4091-b018-b73f44aa3651",
"scope": "openid audience profile microprofile-jwt email"
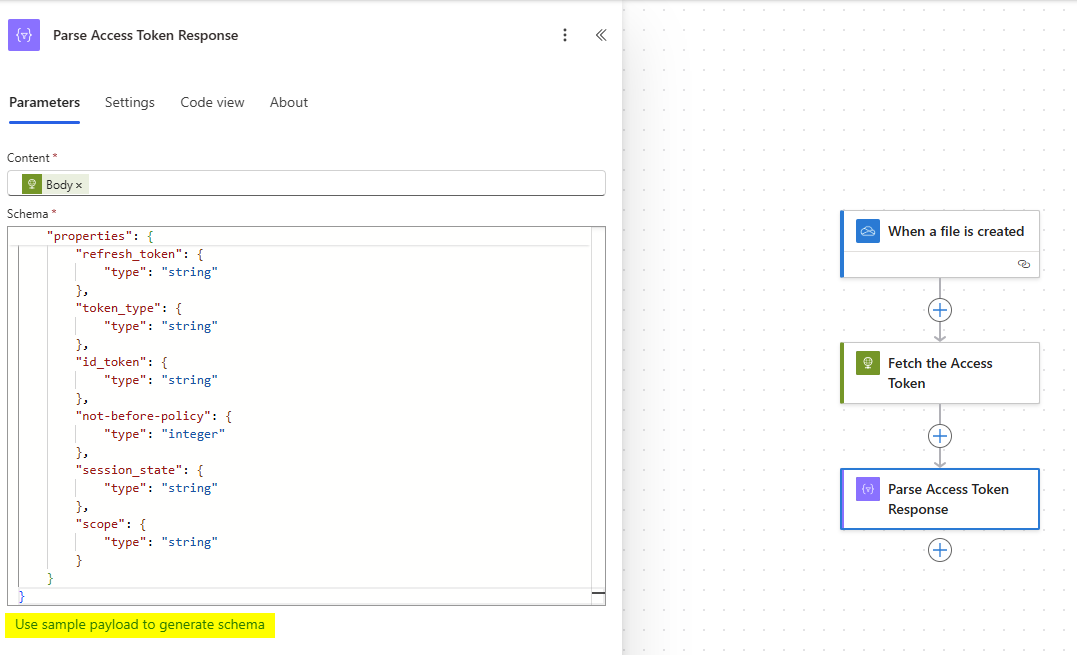
}4. Parse JSON and Extract Access Token
Add a new action after fetching access token and select the Parse JSON operation
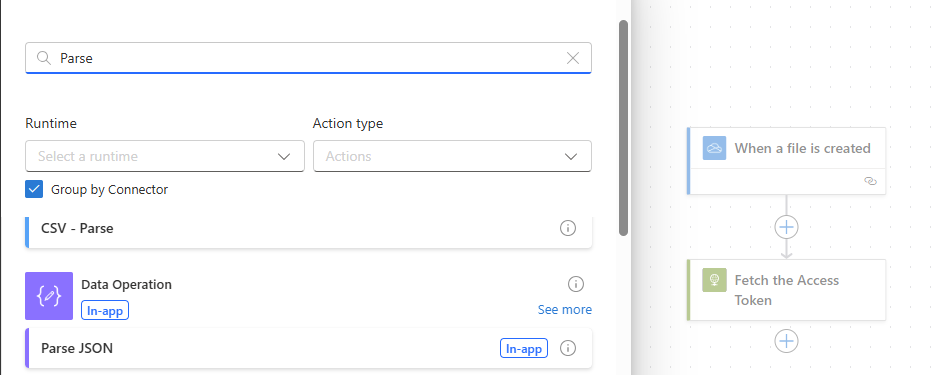
Set the Content as Access Token Body parameter from the Dynamic content, and copy the above access token response JSON in Use sample payload to generate schema.
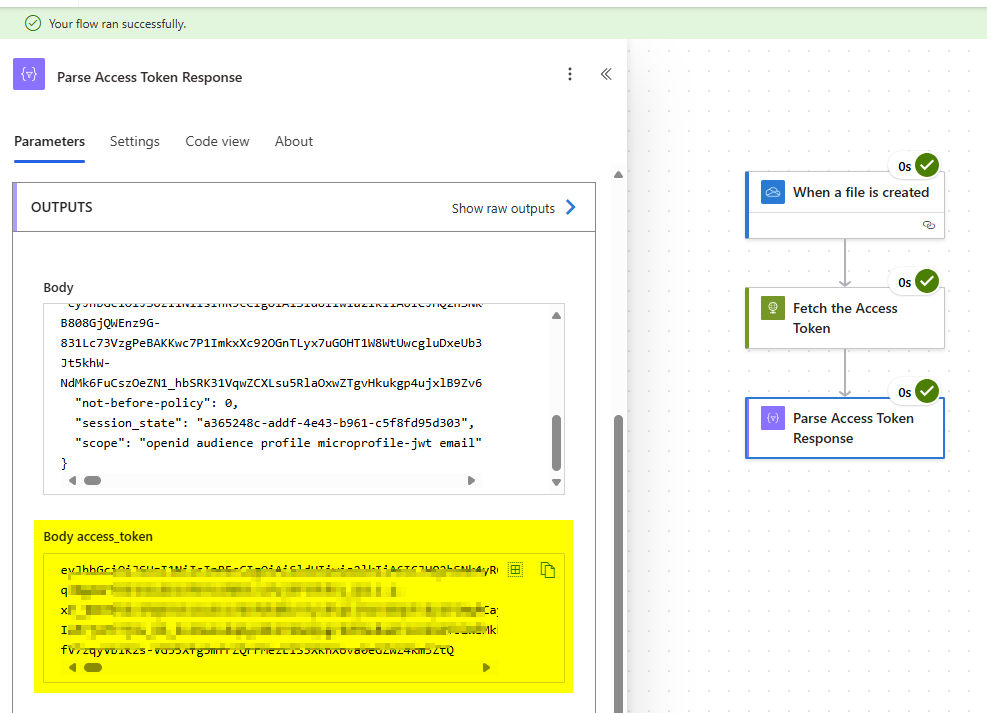
Now test your flow again and verify if the parse step works and the parse properly extracted the access token as output.
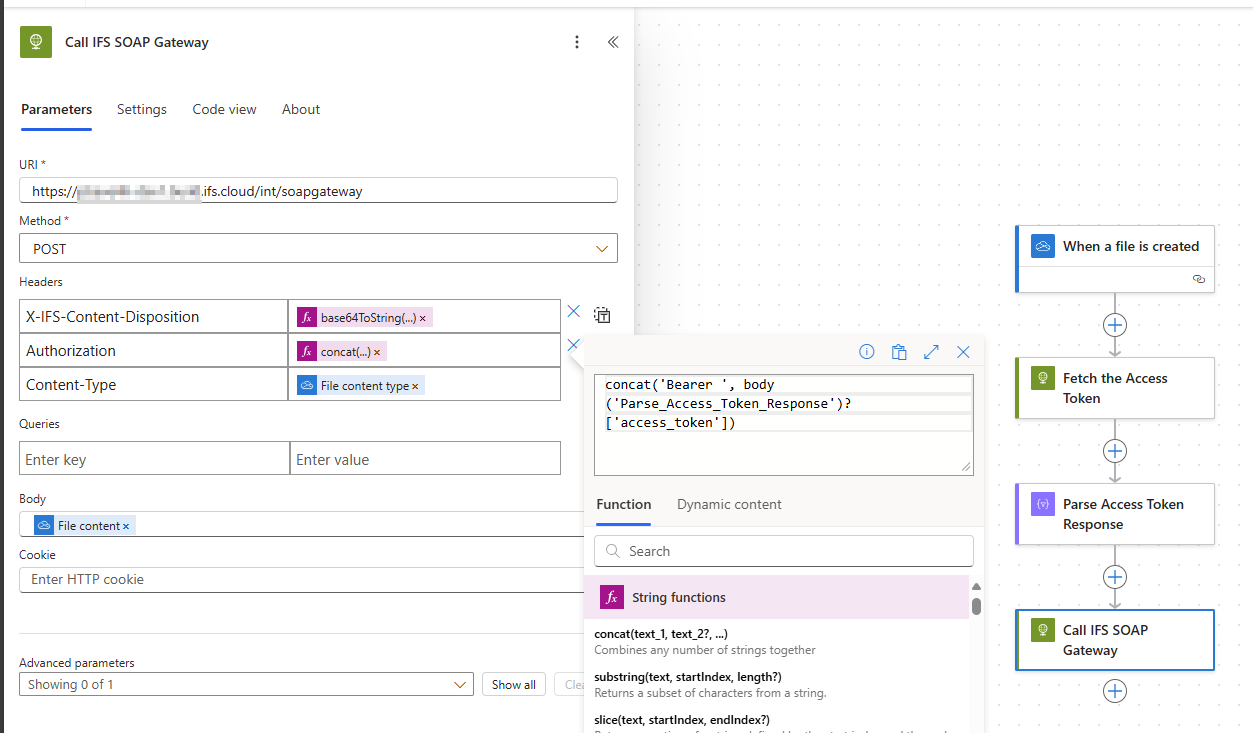
5. Send the Request to IFS SOAP Gateway
Now we are in most interesting part. Add a new HTTP connector as we did in step 3 and configure it as follows.
- URL: <IFS_CLOUD_URL>/int/soapgateway
- Method: POST
- Headers:
- X-IFS-Content-Disposition = File name from the OneDrive trigger
- Authorization = Bearer + Access token extracted from above step
concat(‘Bearer ‘, body(‘Parse_Access_Token_Response’)?[‘access_token’]) - Content-Type = File Content type from the file
- Body: File Content
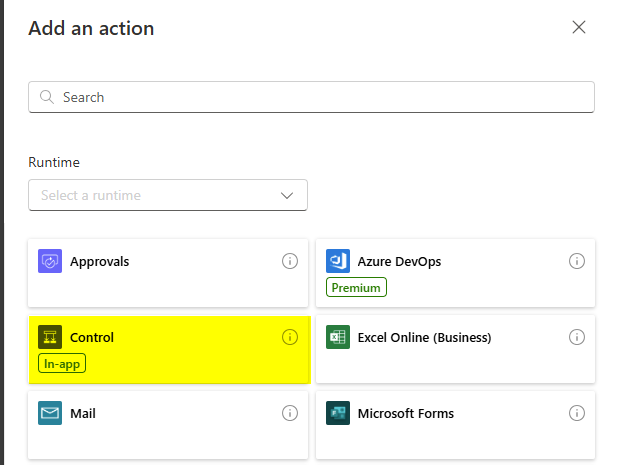
6. Copy the file to Archive
Add a Control action and select Condition
In the Settings, choose Is Successful, Has timed out and Has failed actions since we want to remove the file from \in folder regardless of the outcome from IFS.
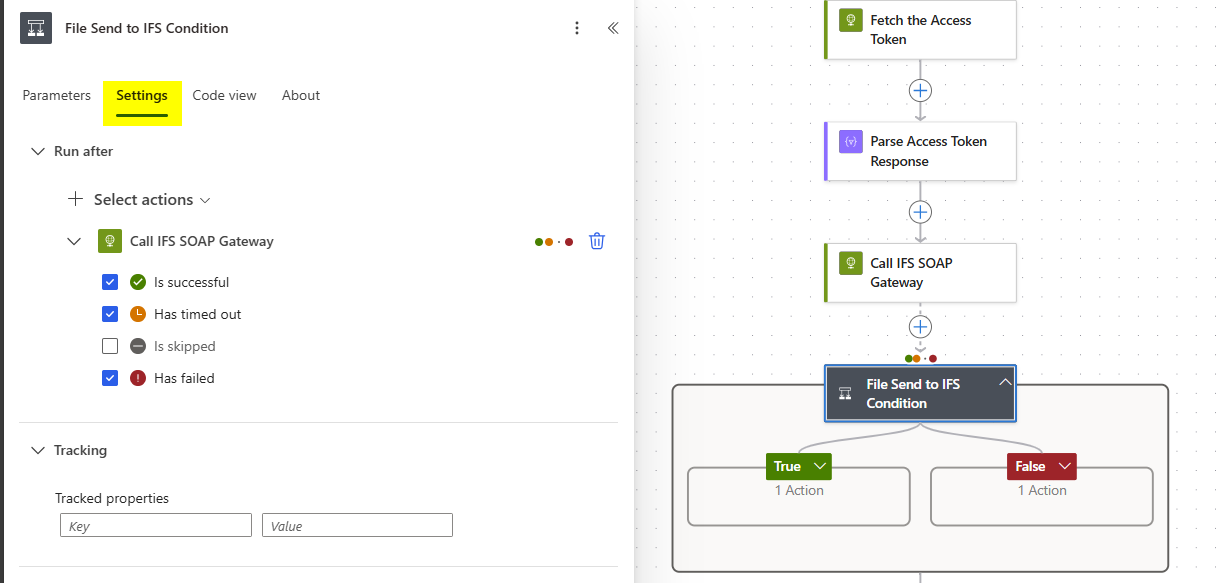
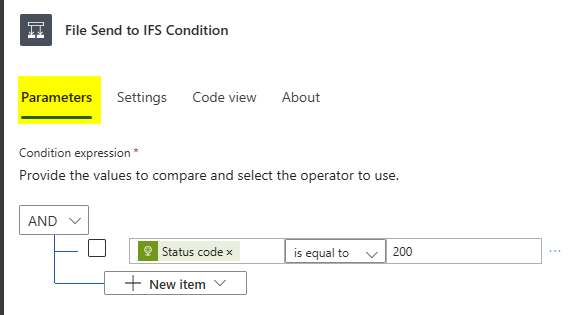
In the parameters, check the status code from IFS Soap gateway HTTP action equals to 200 to recognize a success response.
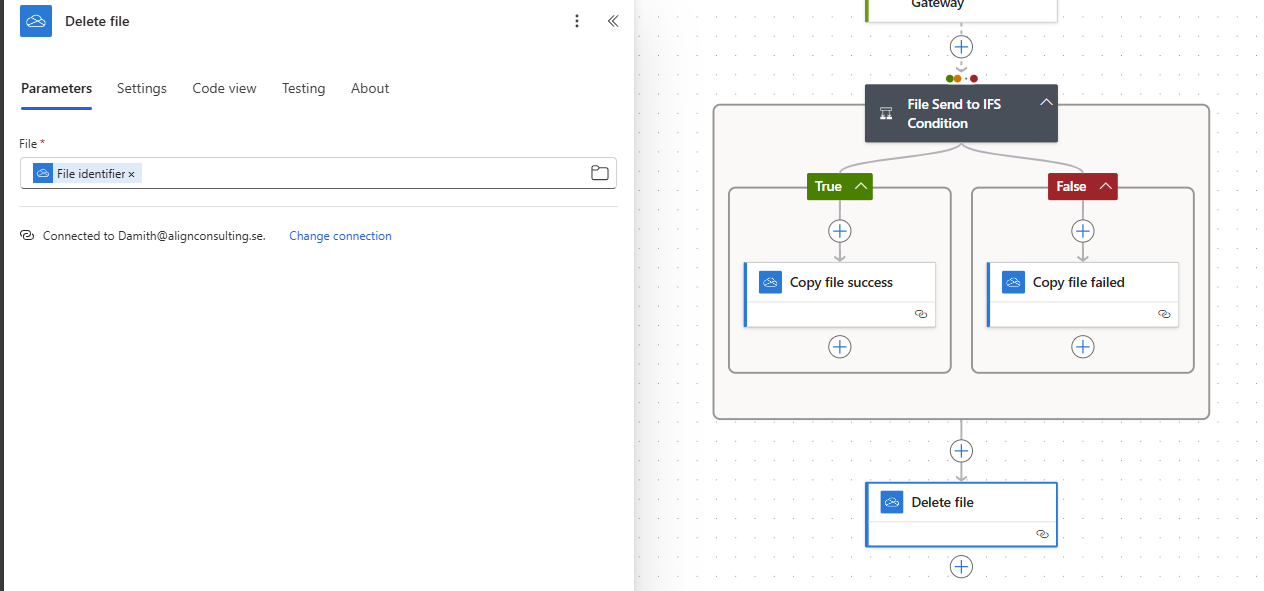
In the condition operator, add One drive Business Copy file actions to both True and False branches. Set the parameters as follows.
- File: File identifier from the Create file in OneDrive operation (same for both branches)
- Destination File Path
- True: concat(‘/IFS_File_Reader/CFG/archive/’, utcNow(‘yyyyMMddHHmmss’), ‘_’, ‘success_’, base64ToString(triggerOutputs()?[‘headers/x-ms-file-name-encoded’]))
- False: concat(‘/IFS_File_Reader/CFG/archive/’, utcNow(‘yyyyMMddHHmmss’), ‘_’, ‘failed_’, base64ToString(triggerOutputs()?[‘headers/x-ms-file-name-encoded’]))

7. Delete file from the in Folder
Now we are in the last step of deleting the file from in folder. After the Condition action, add a OneDrive for Business Delete file action. In the Parameters, set the file identifier from the file is created action.
Testing
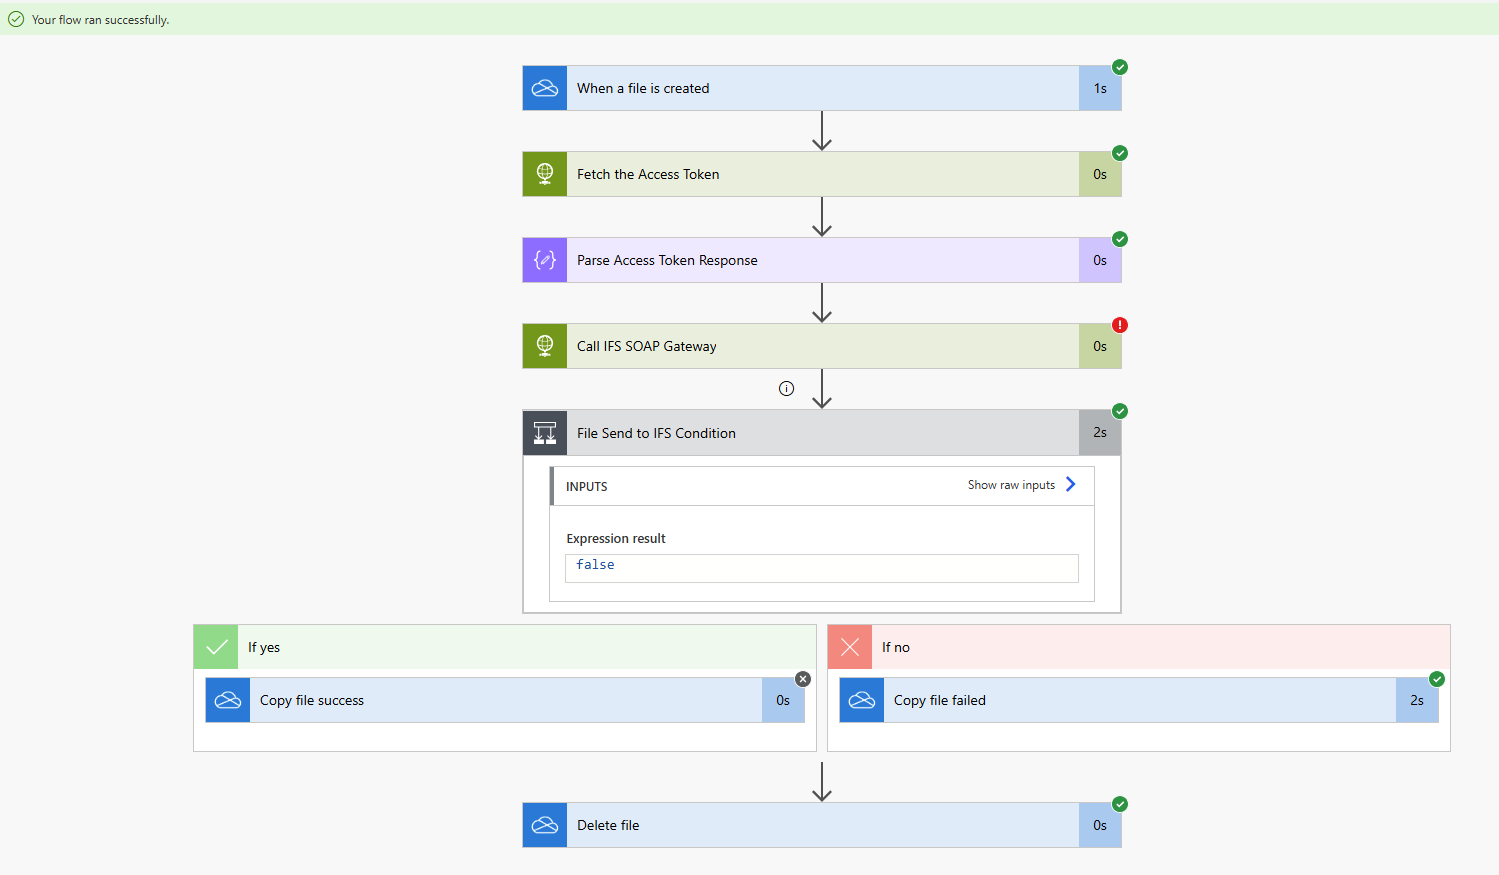
Now our flow is completed and ready to go! copy a file in to the OneDrive folder in folder and observer for few minutes. If everything works fine, you should get a Failed application message and the file is copied to archive folder.
Go to the Flow page and check the run history;
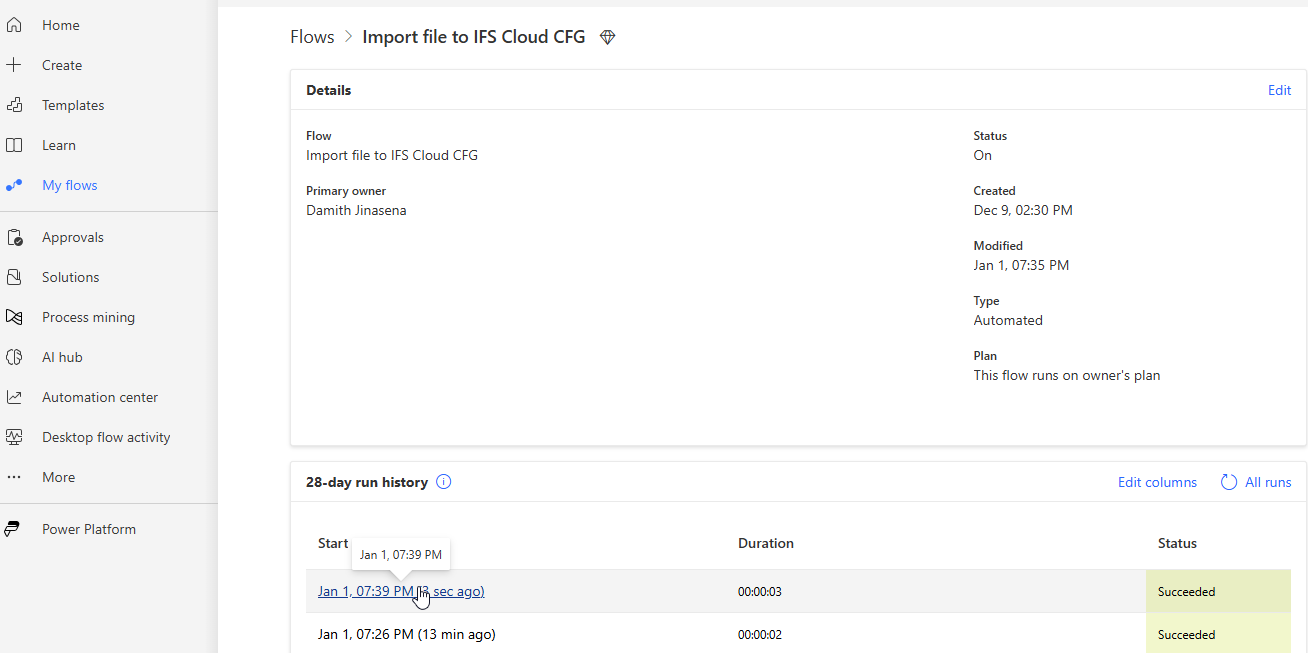
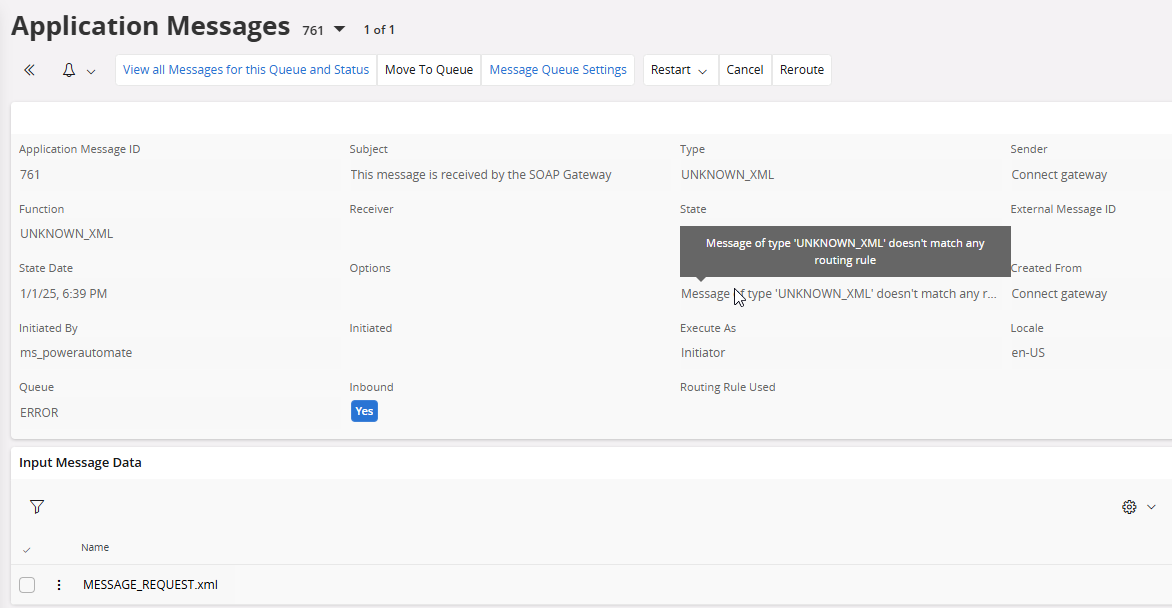
My flow run successfully but got a HTTP 500 from the SOAP Gateway since there are no routing rules to process the file.
Application Message:
In this example, I’m using a CAMT54 bank transaction file as an example and enabled the IFS standard routing rule Example_Receive_CAMT_054.
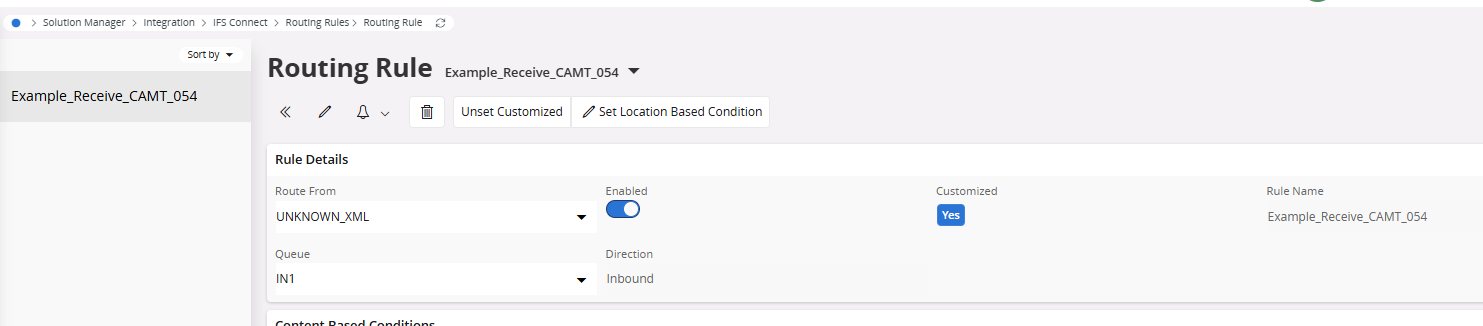
Copy a file matches to the routing rule and observe the outputs. You can use the following sample CAMT54 xml file if you need an example.
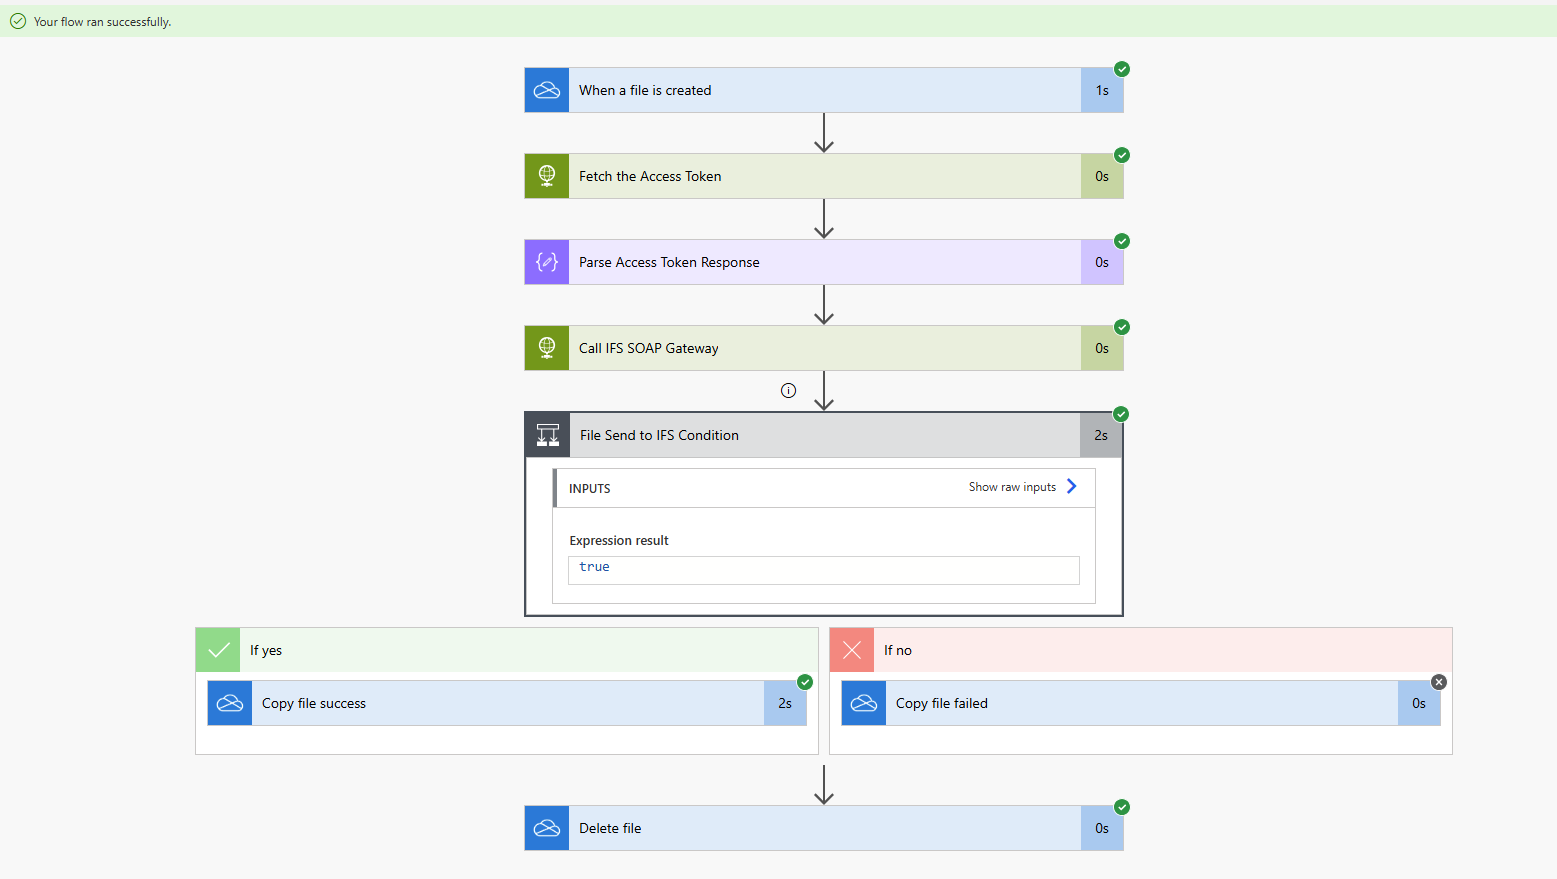
Now the file picks up by the routing rule and processed. Therefore we get a success response.
Conclusion
There are countless exciting opportunities to harness the power of the IFS Cloud SOAP gateway in your integrations, and I truly believe this post will ignite a spark for those unfamiliar with its incredible capabilities. Similarly, Microsoft Power Automate stands as a dynamic platform that empowers you to create seamless integrations without the need for extensive coding knowledge or technical expertise. My hope is that this post serves as an inspiring guide for anyone searching for innovative solutions that fuse the remarkable potential of Microsoft Power Automate with the transformative capabilities of IFS Cloud💡. Share your thoughts in the comments!

Hi Damith,
This is really interesting approach and I have tried things out my self. I used postman to test things out, and I got files in. However when I tried to use Power automate, it is stuck on the upload process but never pass that step. Do you happen to have any ideas on why I’m seeing that kind of behavior?
Thanks in Advance
Avindu
Hi Avindu,
Do you have any error in the power automate execution history during the upload process?
BR,
Damith
Hi Damith,
It spins for almost 15 mins and gives HTML error 500 (Internal Server Error).
Thanks,
Avindu
Hi Avindu,
Really sorry for the late reply due to my busy schedule past month. In which step it gives the 500 error, is it while reading the file or post to IFS?
If it’s coming from the IFS call, check the routing rule if it has a queue defined.
Hi Damith,
It was the routing rule. It was in the blog, do not know how I missed that! 😀
It’s easy to miss that. Glad that it worked finally 🙌