Intro
There were several comments on my previous blog posts, questions from my friends and posts in the IFS Community about how to access IFS projections from 3rd party platforms like Power BI. I have tried several options such as creating a power query script to perform the authentication and create a custom connector for this purpose, but non worked as I wished so far unfortunately. Therefore, I have tried a different approach which was fairly a success, which is the topic for this post.
If you are new to IFS Cloud authentication concept, it would be worth reading below post to understand the basics before moving further:
As you may already aware, only OAuth2 authentication is supported in IFS Cloud for both B2C and B2B integrations. Therefore, the first prerequisite to verify when building an integration with IFS Cloud is that whether your 3rd party app or service has in-built support for generic OAuth2 authentication. Many integration platforms supports OAuth2 and if you are using one of them, then you are in luck! See my blog post Getting Started with Microsoft Power Apps with IFS Cloud regarding one such example which explains connecting Microsoft PowerApps with IFS Cloud.
If your 3rd party app doesn’t support generic OAuth2 authentication, then one option to overcome the problem is to implement a middle layer (proxy) to handle the authentication, which will be explained in detail in this post.
What is an API Proxy
Basic functionality of a API proxy is to receive the requests, call the backend service and send the response to the consumer. In addition, a proxy can be used to modify the request before sending it to the backend. We can use this capability to perform the authentication before making the actual request.

Authentication with API Proxy
With a API Proxy, we can use a fixed IFS user to authenticate the request. Therefore the sender doesn’t need to obtain the OAuth2 token before sending the request. It will be done by the proxy and add to the request. Therefore, apps like Power BI can directly connect with IFS without needing to worry about the authentication.
This solution sounds very convenient but keep in mind that it comes with a price. We are compromising the security aspect with this setup since the IFS user is hard coded in the proxy. Therefore, make sure to use other measurements (using API keys, IP restrictions ...etc.) to limit the access of the API proxy.
Setup
I will be using Azure API Management to implement the API proxy. You need a Azure subscription to start building and hope you have one already. Don’t worry about the cost! Since we are building a primitive API Management setup, we could survive with the free benefits of the Azure APIM.
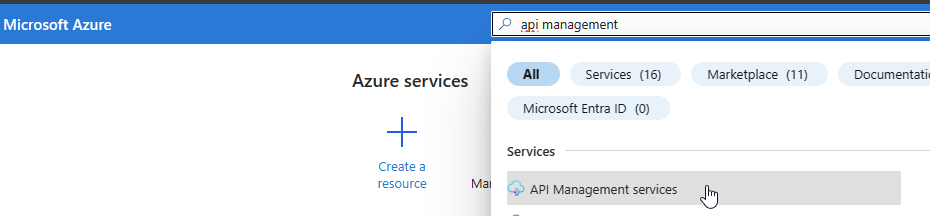
Login to Azure portal with a valid subscription, search for API Management services, and create a new resource.
Select Region, give a resource name, organization and a email.
Note that the Resource name comes as the first part of the API gateway URL. Therefore it needs to be unique and make sure to choose a meaningful name.
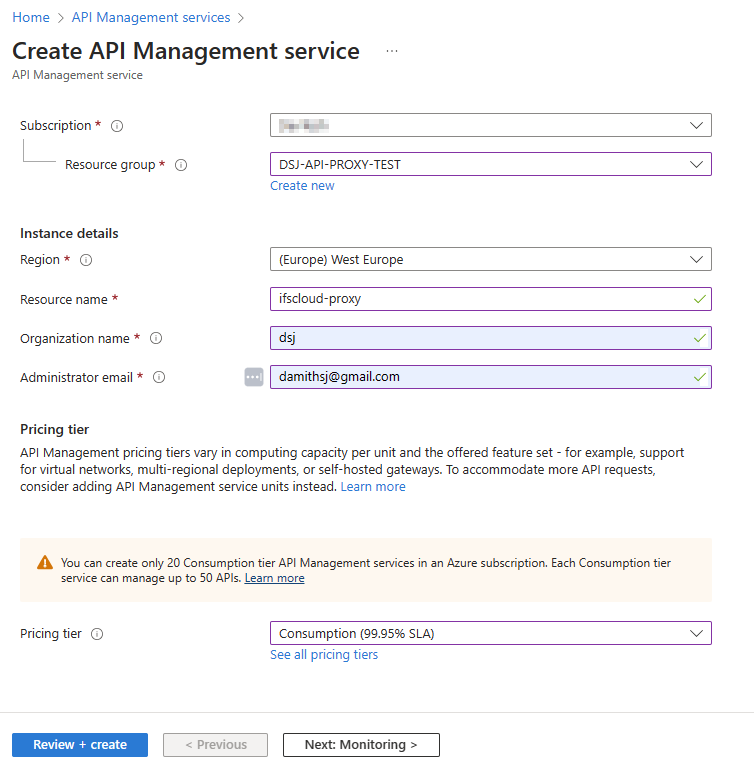
I have selected the Consumption pricing tier, and it includes 1 million free API operations per subscription which would cover our requirement 😎.
Create the resource. Usually it takes few minutes to complete.
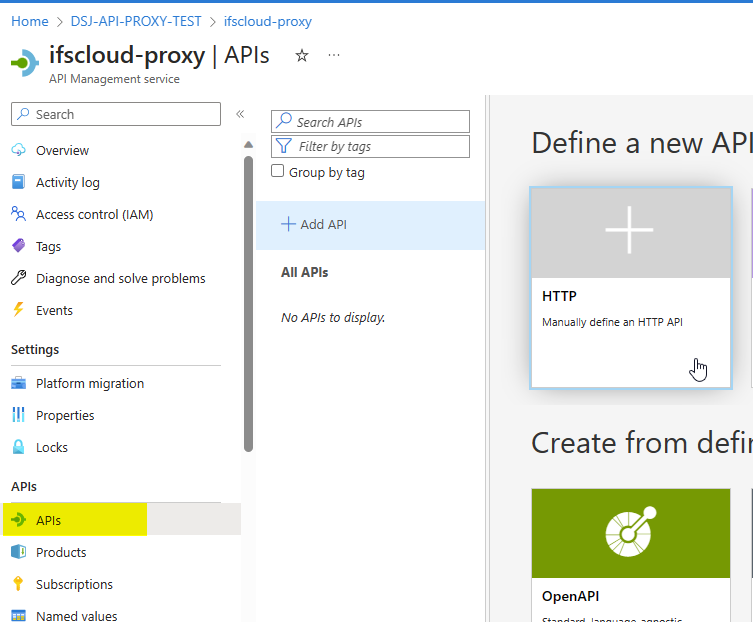
Once it’s deployed, go to the service, choose APIs from the resource menu, Add API. Choose HTTP
Give a name. If you are hoping to create multiple APIs, it’s better give a API URL suffix, otherwise it can be left blank.

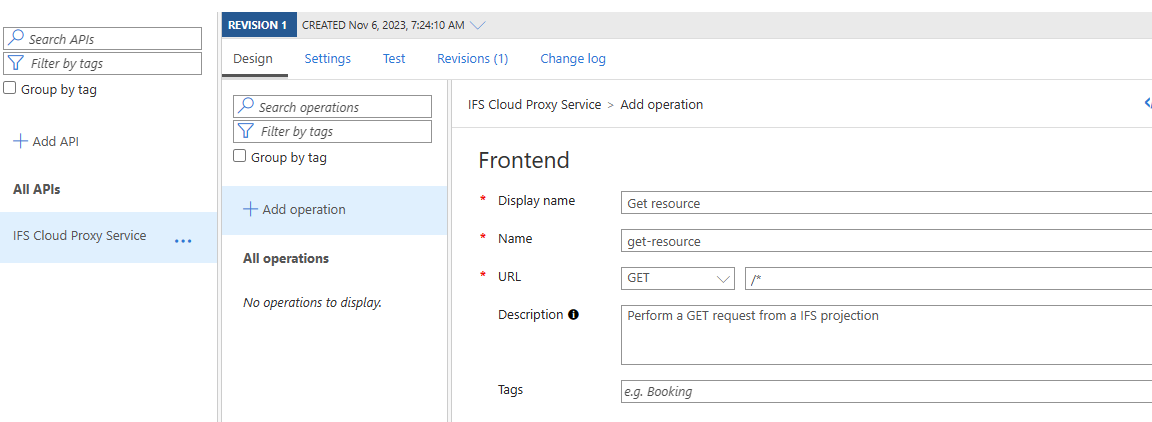
One API can have multiple operations. In our scenario, we need at least one GET operation to access IFS data from external. Press Add operation and give a display name and a description. Most important part is the URL. Pick GET as http verb and add /* as the URL which means it will pass through the URL to the backend.
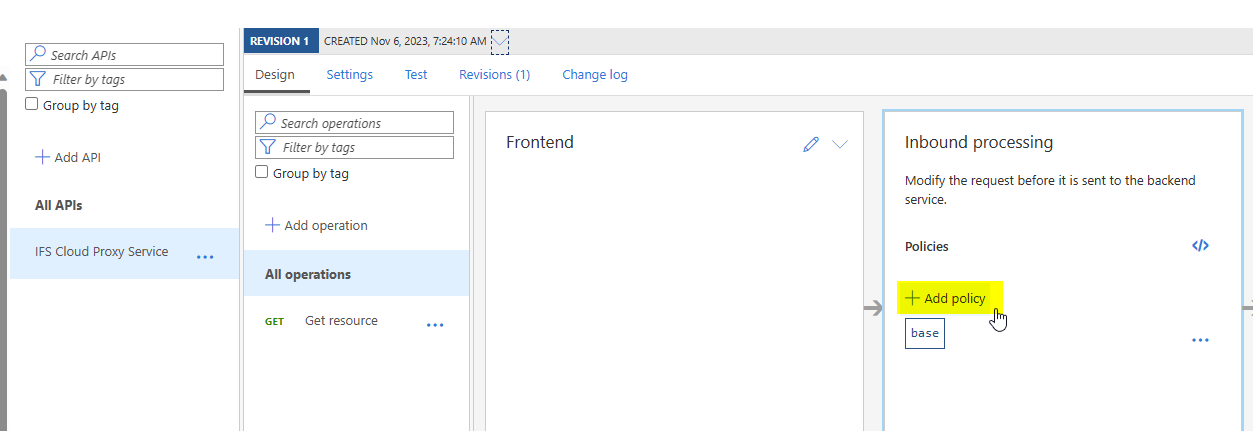
Now it’s time to implement the logic to fetch the OAuth2 token and add to the request. In the Azure API management, Policies can be used to change the behavior of the APIs through configuration. There are policy templates for different purposes and it’s a very powerful feature and deep topic to discuss. I will be using an example policy snippet below (which is a copy of an by Azure GitHub repo api-management-policy-snippets) to perform what we need.
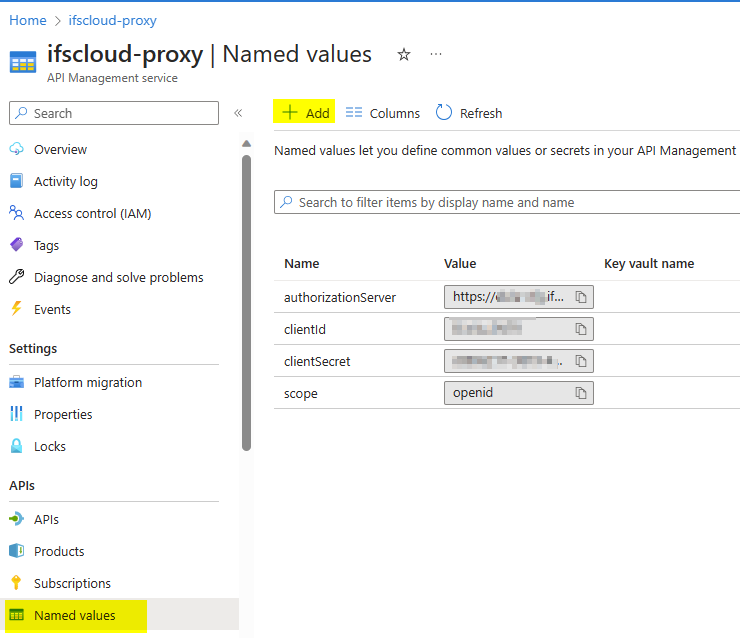
Before adding the policy, we need to define the values used in the policy. Go to the Named values in the resource menu and create following values.
- authorizationServer: Token endpoint URL with format {{ifs_url}}/auth/realms/{{ifs_namespace}}/protocol/openid-connect/token
- scope: openid
- clientId: IFS IAM client ID (Refer Service User Authentication (Client Credentials Flow) for details). ⚠️ Always grant the ONLY the necessary permission to the service user since this user will be exposed for public access.
- clientSecret: Client Secret
Now, copy the policy snippet above and paste in the Inbound processing section of the API created above. I have added it for All operations, but you can choose to add it for each operation level as well.

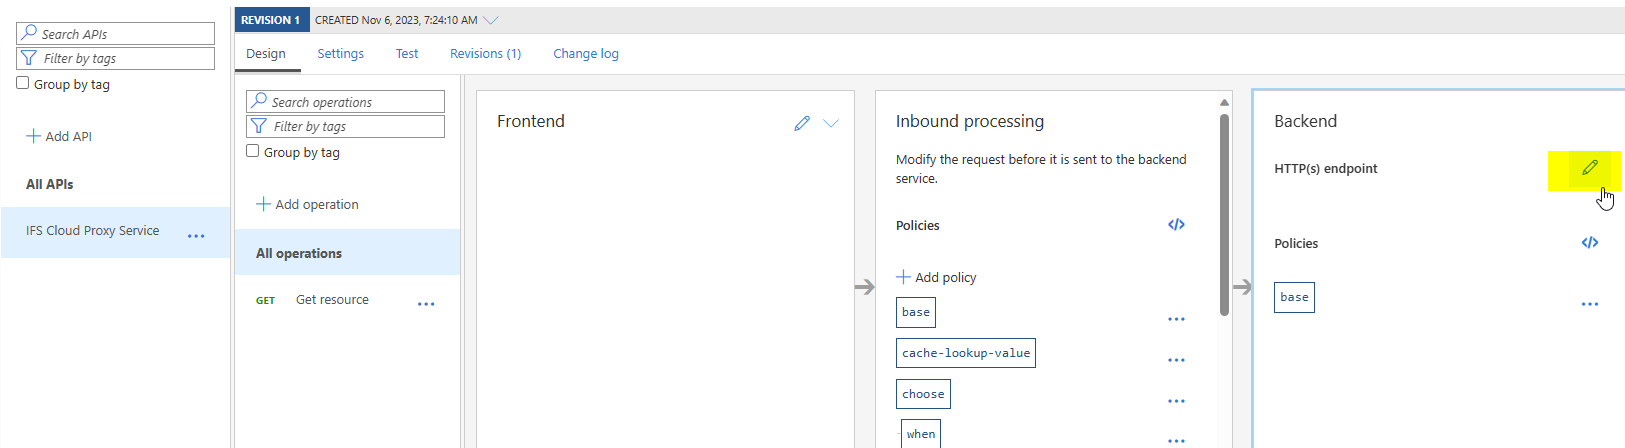
Edit the Backend section and add IFS URL in the Service URL section.

That’s all we need to make it work!
On the Overview, copy the Gateway URL which we can use to access IFS projections.

Using the API Proxy
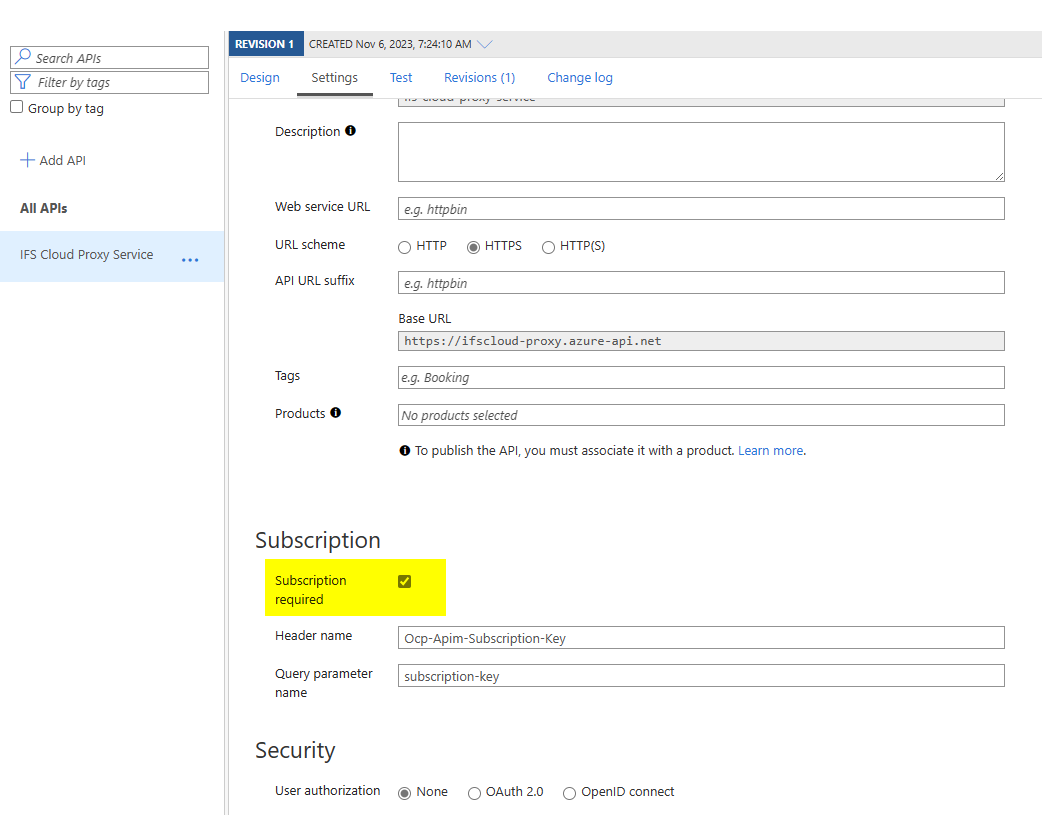
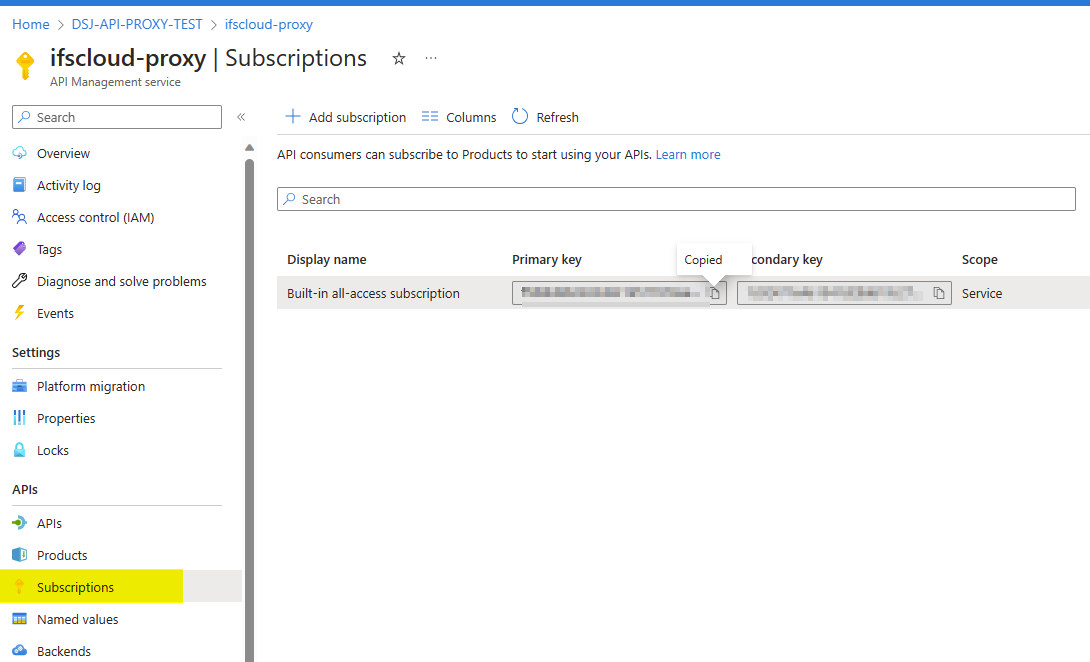
Azure APIs needs a subscription to access by default. This can be disabled in the API settings if you wish to give open access. Otherwise you may create a subscription or use the Built-in all-access subscription provided. I’m lazy to create a new subscription and decided to go with the all access subscription. But it’s really worth spending some time to create subscriptions and add APIs into Products to manage access to APIs in a proper way.
Go to Subscriptions, press … to the right of the subscription and go to Show/hide keys. Copy the primary key.
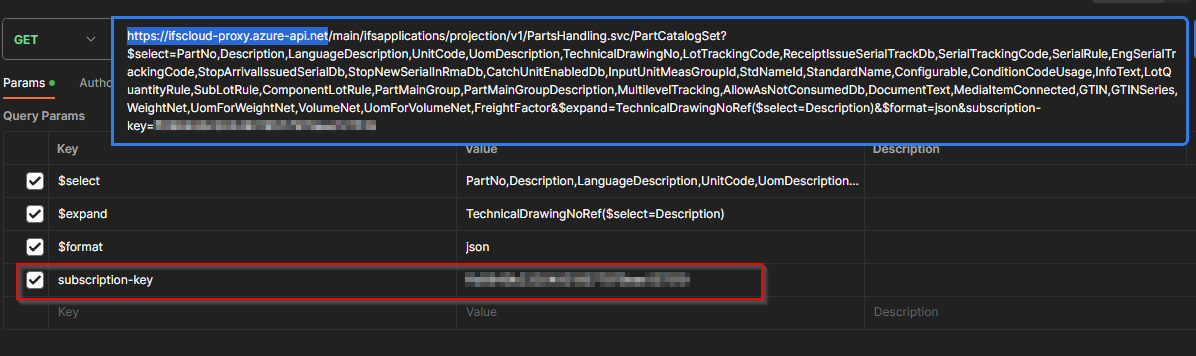
There are two options to add the subscription key. As a header or as a query parameter. I’m using the subscription key as a query parameter since then we don’t need to add additional headers to the request. With that, the URL to access IFS projection is as follows:
https://{{api_gateway_url}}/main/ifsapplications/projection/v1/{{ifs_projection}}.svc/{{entity_set}}?subscription-key={{API_subscription_key}}
Usage In Power BI
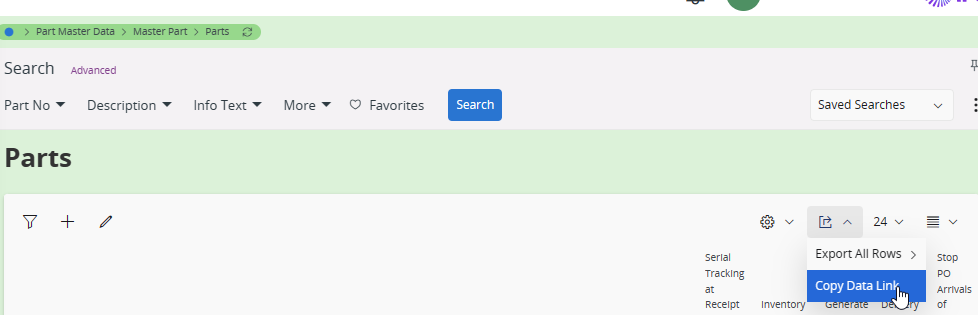
Easiest way I found to get the correct URL is by performing the query in IFS and Copy Data Link. Otherwise you could use the debug log window also to find the request URL.
Then it can be copied to Postman to change the URL to the API gateway and add the subscription key.
Open Power BI desktop and use Get data > Web
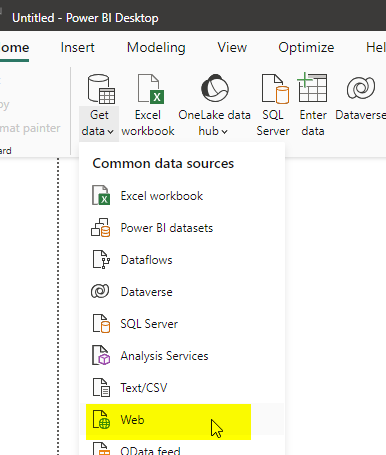
Copy the URL and choose Access as Anonymous

Voilà! you should see the results 😎

I’m far for being a Power BI expert, therefore better stop here 😂. Hope you got the idea and would continue to make wonders with IFS Cloud and Power BI.
Keep in Mind☠️
This concept works and you could access IFS data with Power BI or other platforms using this method. But note that we have used a hard coded user for the access, and the API gateway is a public endpoint. Therefore, use it for minimum requirements and explore the security measurements given by Azure API management and ALWAYS restrict the access as much as possible.
Good luck with exploring new heights with IFS Cloud! Please add your thoughts in the comments section.

Hi Damith,
Thank you for this post; it is really helpful. We are currently upgrading to IFS Cloud. We are using APIM for different calls and also Power Apps.
Now, the issue is that we would like to use personal users from Entra ID. In your example, you are using a service user. Have you tried using a personal Active Directory user? Do you have any hints on how we can implement this without security issues, such as avoiding hardcoded users?
I really appreciate your help and your blog.
Thanks,
Cedric
Hi Cedric,
Thanks a lot for your comment. You can use a APIM to call IFS projections with end user authentication. When configuring the PowerApps custom connector, use the IFS IAM in the authentication. More details on this can be found in my other blog post on PowerApps https://dsj23.me/2023/08/08/getting-started-with-microsoft-power-apps-and-ifs-cloud/
In the custom connector, host and base url should be of you APIM and add the operations from the apim as required.
In the APIM, make sure the inbound headers are pass through to the backend API (IFS projection)
Hope it gives some insight to over come your issue 🙂 let me know if you need more help on this