The Story behind…
I’m a Technical consultant by profession and integrations has been my passion for several years now. It’s amazing to see how fast the integration industry is evolving and today, building a complex integration does not need any coding experience and you can connect basically anything if you have the right tools. Integromat is a nicely designed integration platform which has built-in support to connect several hundred Apps and Services so building an integration is a matter of few clicks.
Since few months I’ve been interested in chatbots and attempted to design a chatbot for IFS ERP as a side project. There are plenty of platforms available to create a chatbot free or just for a small amount of money and without coding. Chatfuel is a leading chatbot platform for Facebook Messenger and it’s super easy to use. On the other hand, Integromat has a built in connector for Chatfuel so this combination works like a charm!
My Personal Bot use case 🤖

Managing my work day had been pretty challenging task for me and even after many years, I’m not used to a fixed routine 😆. By evening, I forget at what time I came to office so it’s bit hard to decide what time I should leave the office. As a solution, I decided to create my own personal assistant to tell me when to leave the office💡.
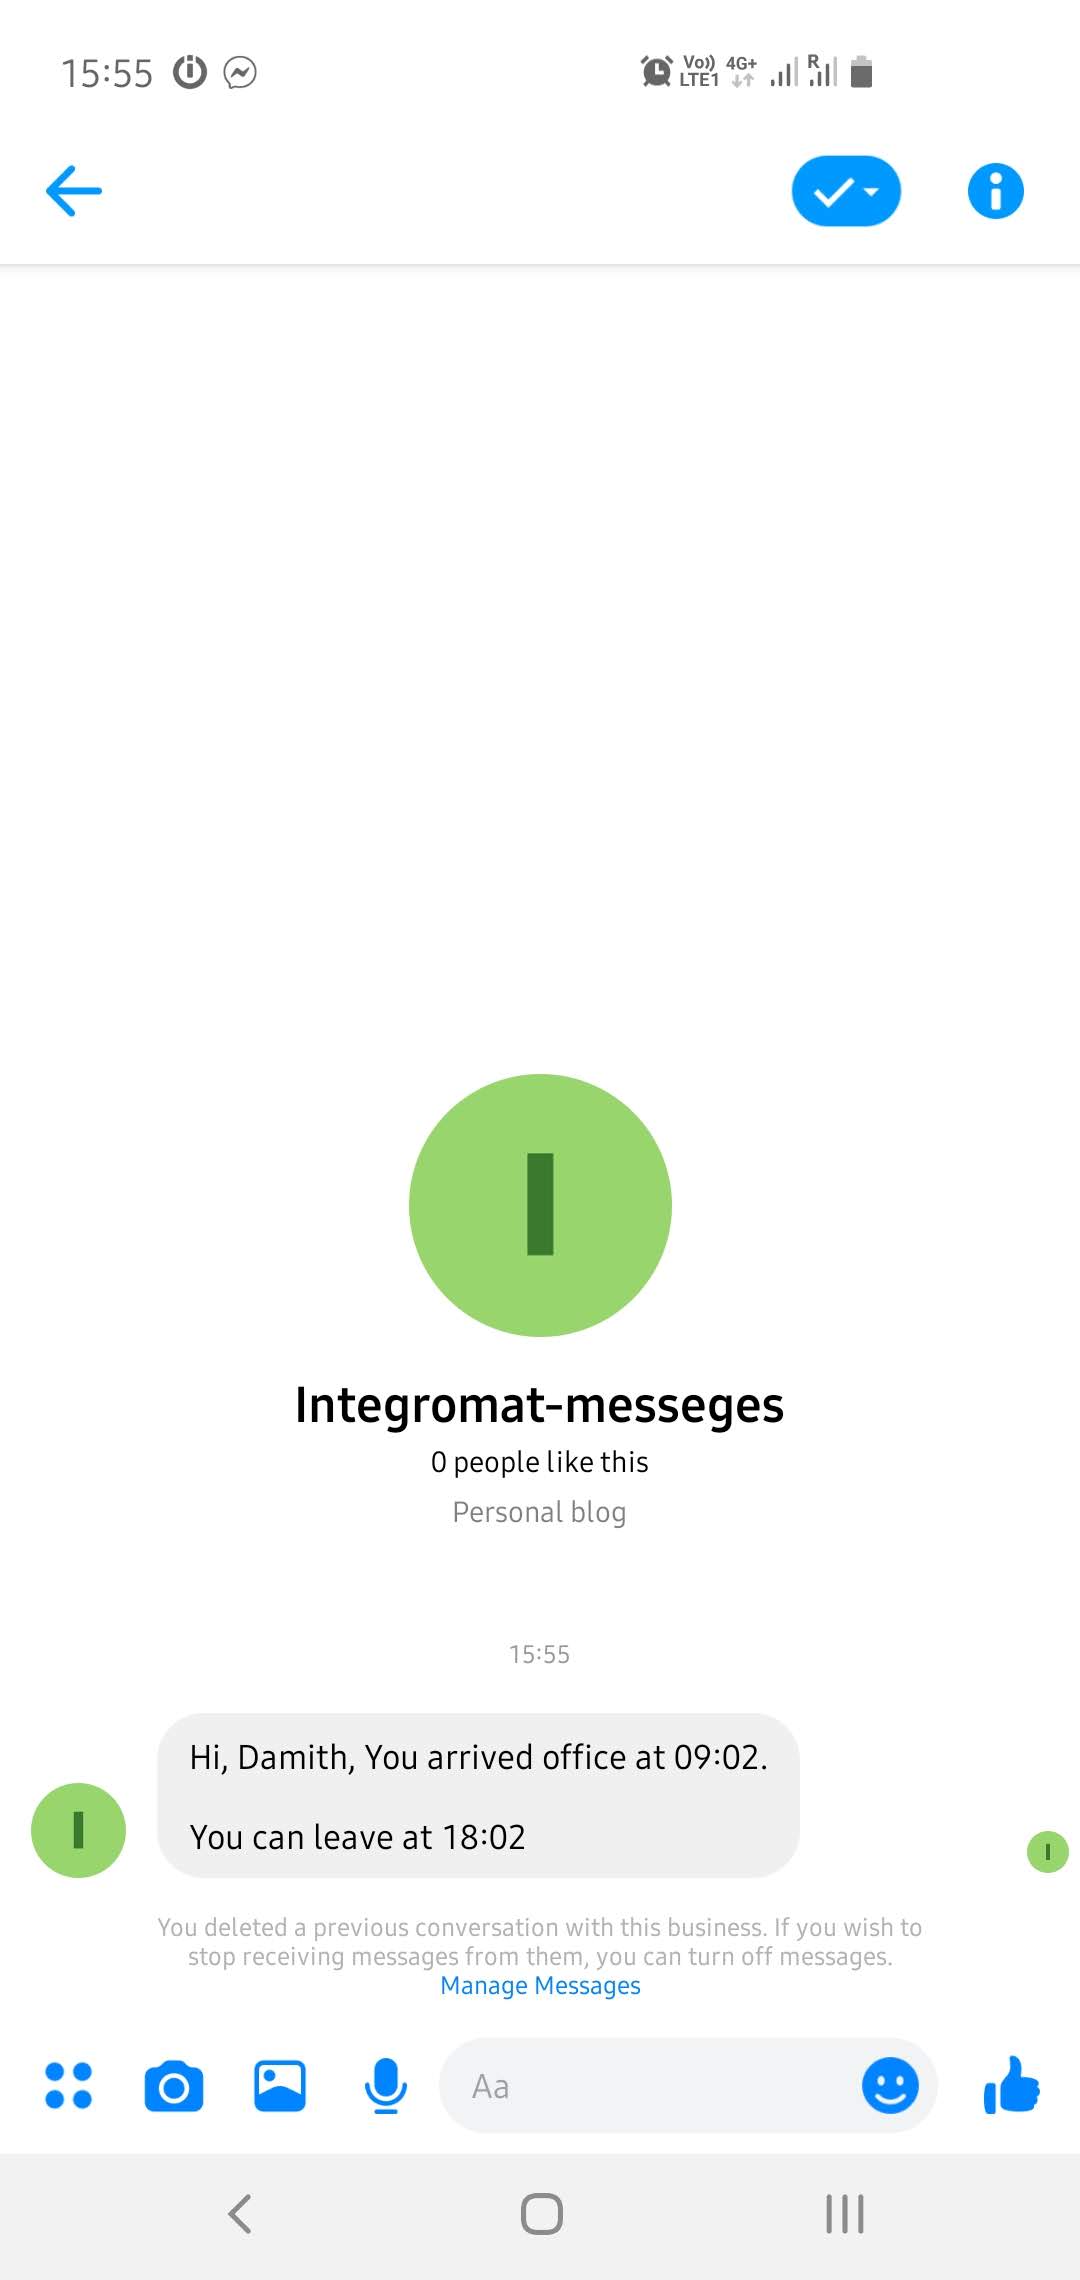
As soon as I entered the office, my assistant bot will send me a message saying the time I entered office and when should I leave the so I don’t have to worry anymore guessing and asking my colleagues the time I arrived, and my boss will be so happy with my attendance record 😈.
Before we start…
- Create an Integromat account- https://www.integromat.com
- Create an Chatfuel account – https://chatfuel.com
- Need to have a Facebook profile with an active Messenger account.
Step 1- Configure Integromat mobile device
- Login to Integromat. Go to Devices, click on Add a device
- Download iOS or Android mobile app to your mobile and give a name to your device, press Next. You’ll get the QR code for your device
- Open the mobile app, Choose Use code option. Scan the code. Now your mobile in connected to Integromat!
Step 2 – Configure office area
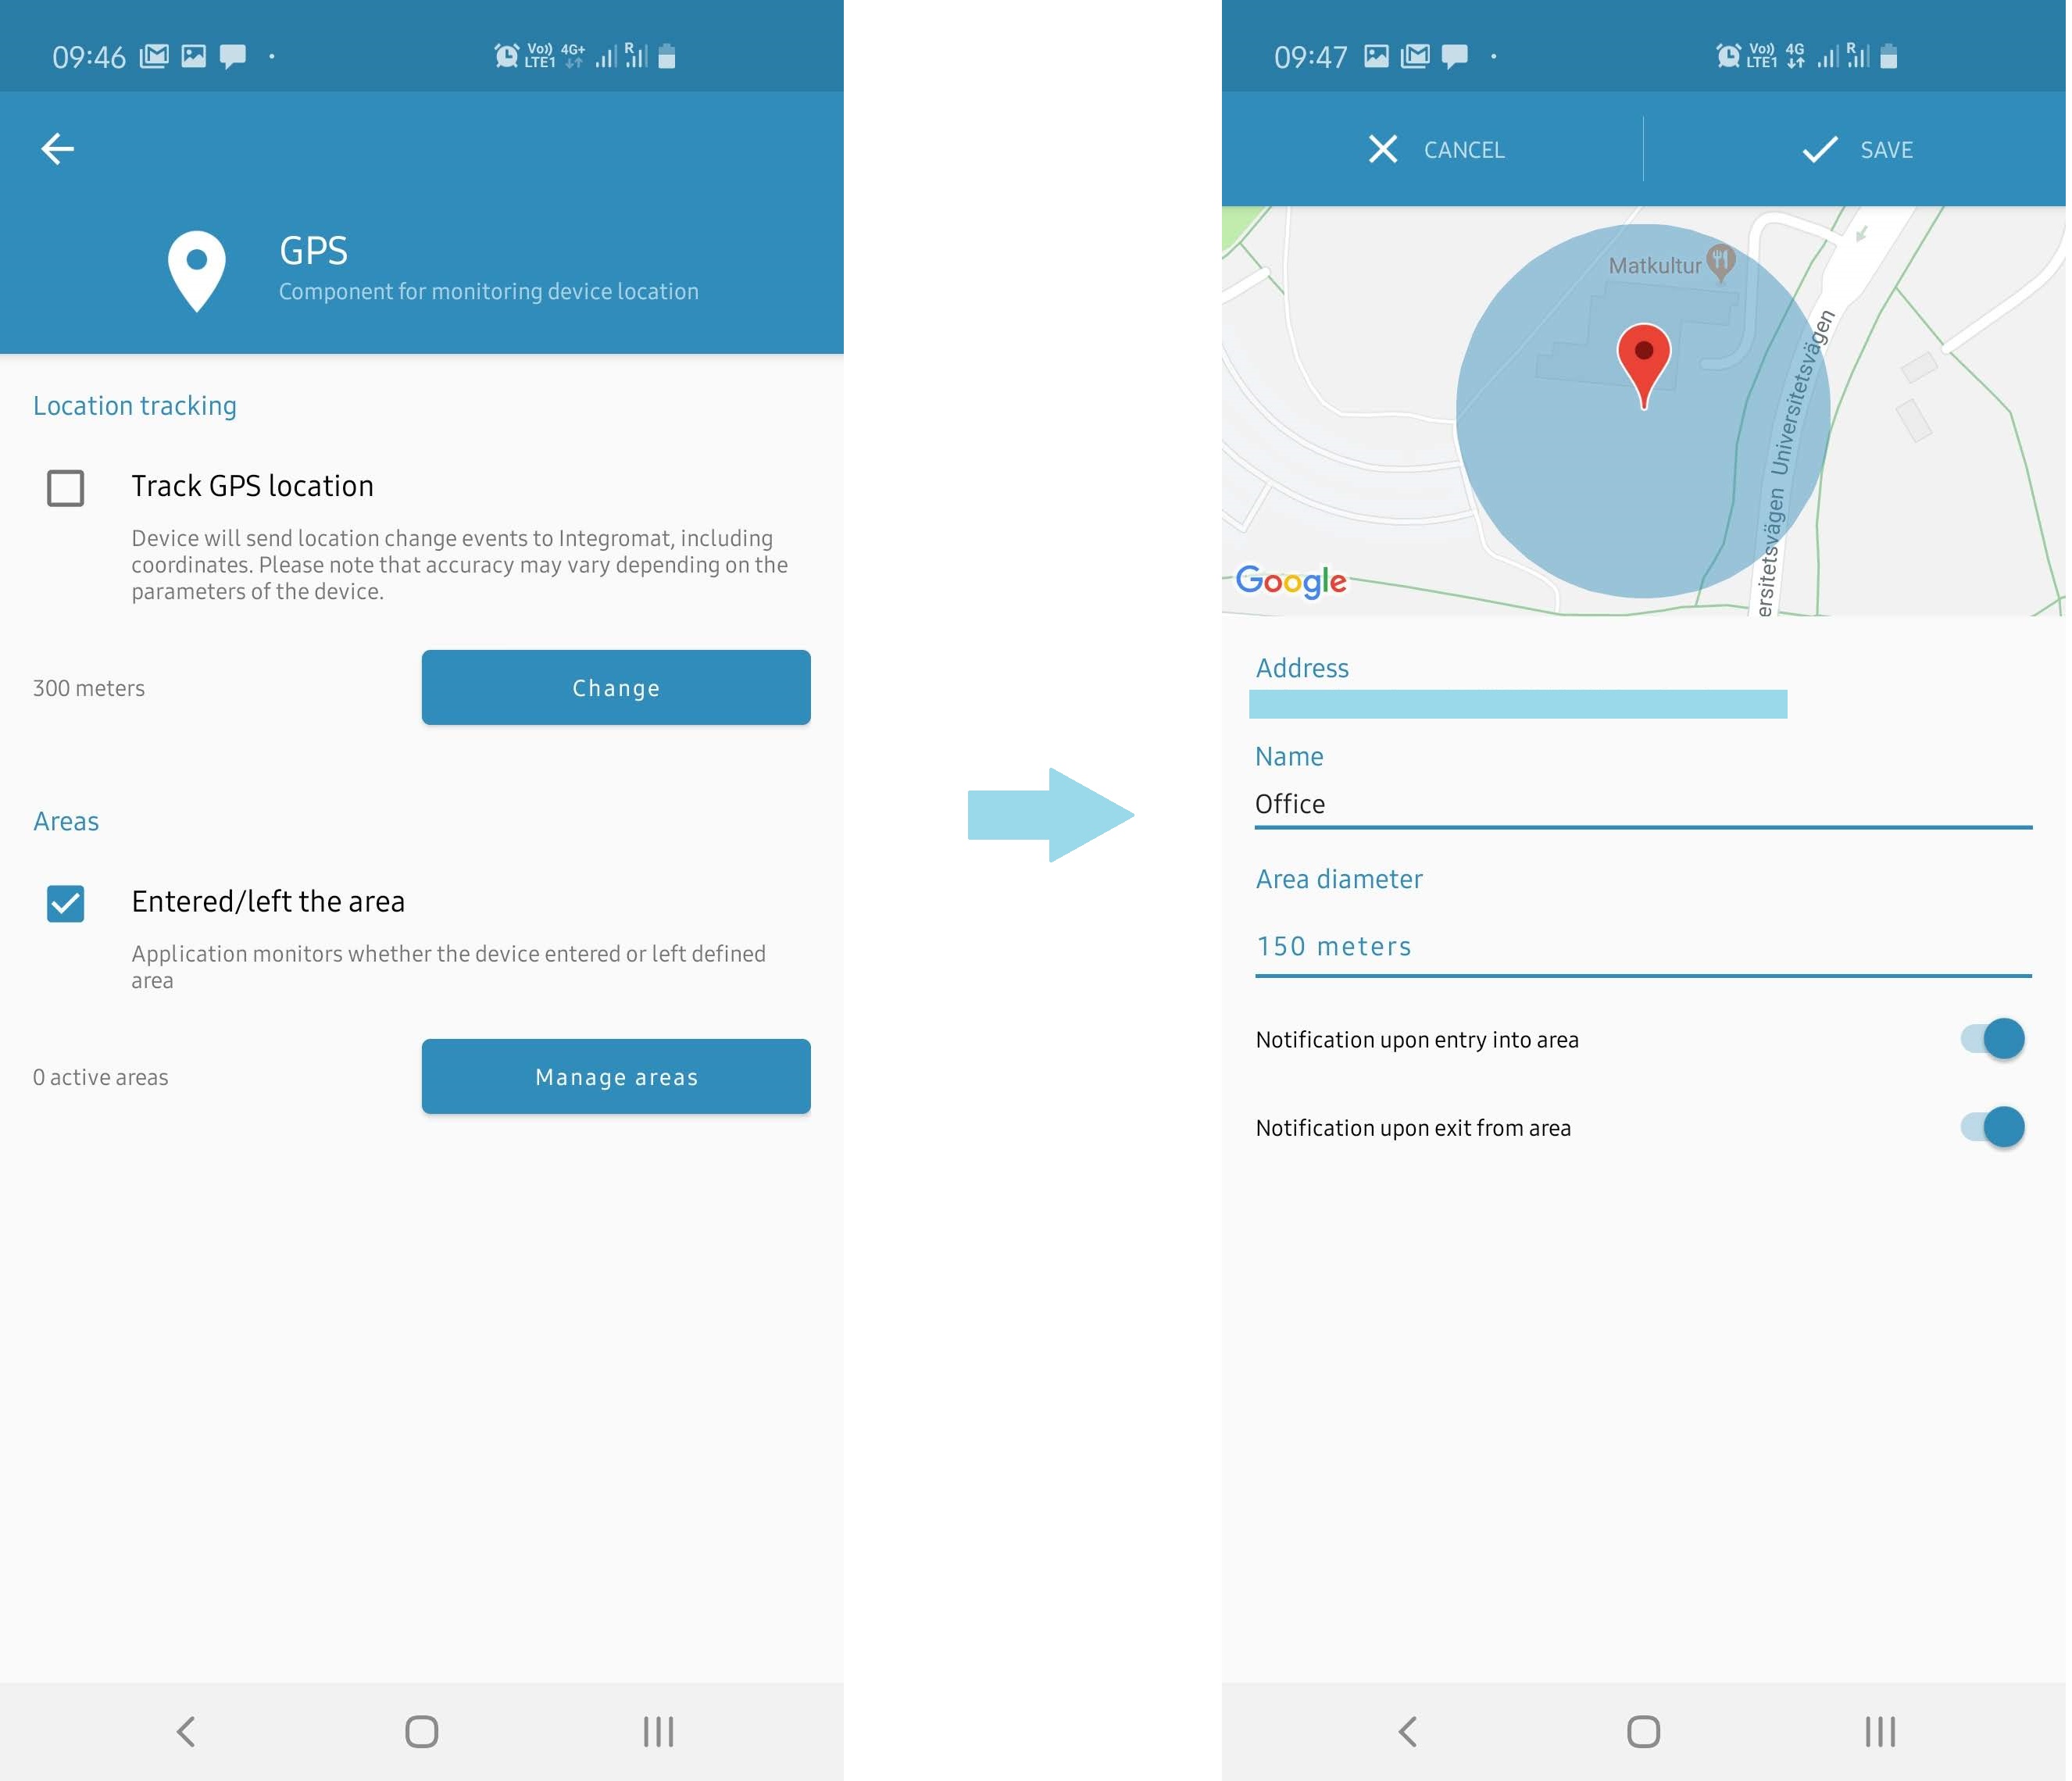
- Open Integromat app on your mobile. Click on GPS
- Check Entered/Left the area
- Click on Managed Areas. Point the location of your office, change area diameter as you want and enable both notification types (we will need only entry notifications in this example)
- Name the area and Save.
Step 3 – Configure Integromat scenario
- Login to Integromat dashboard and press Create new scenario
- Choose Android (or iOS) and Chatfuel services, Continue
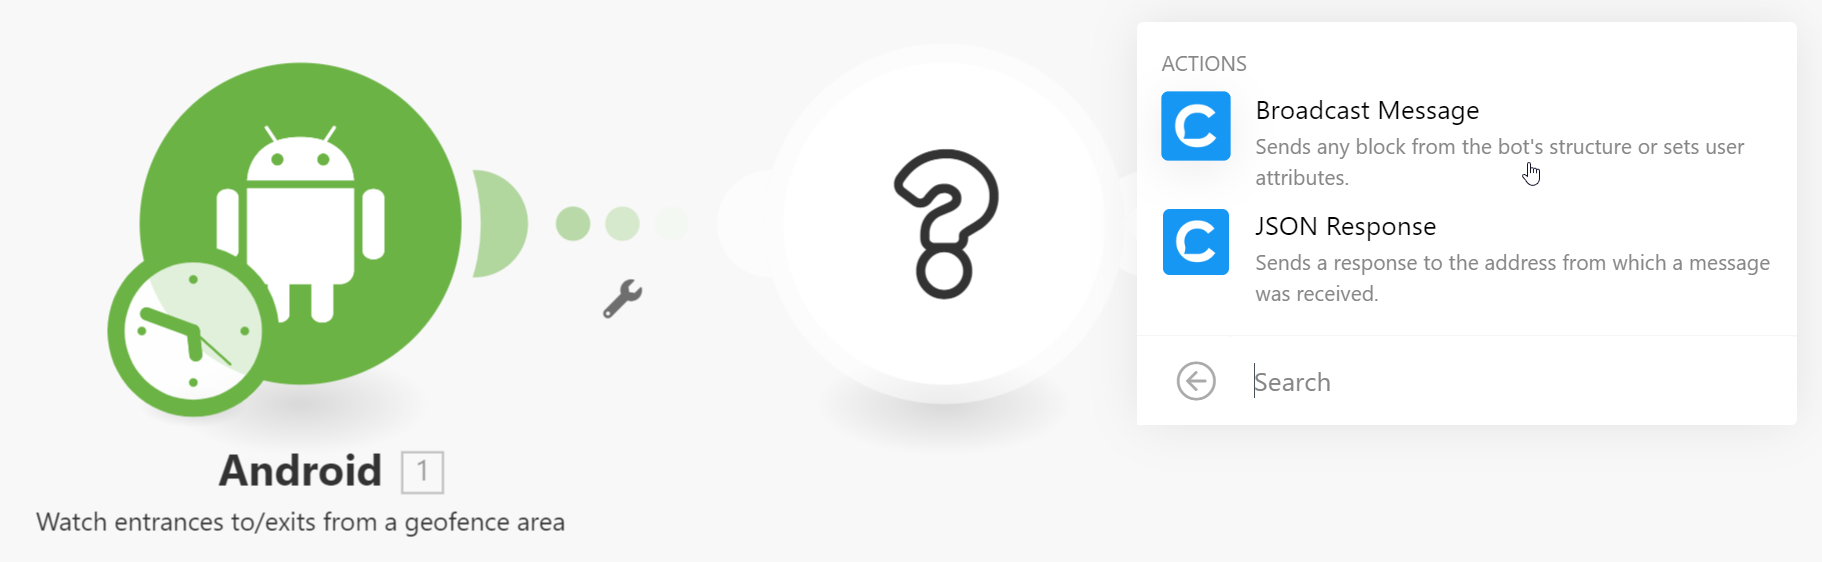
- Click on Question mark and then on Android icon and list of triggers will be appear. Choose Watch enters to/exists from a geofence area
- Select the device added in Step 1.

- Click on the clock icon to change the schedule. Choose Immediately since we need to send the message as soon as enter the office building.

- Click on Add another module button on the Android trigger. Choose Chatfuel, Broadcast message. Ignore settings for now. We will fill them in a minute.
- We need to trigger the message only when entering office area. It can be done by adding a filter

That’s basically the Intergomat scenario. Now it’s time to play with Chatfuel to send the message. First we need to create a Facebook page to connect the messenger.
Step 4 – Create a Facebook page and connect to Chatfuel
- Login to your Facebook account and create a new Page.
- Enable Business integration with Chatfuel to this page. Check below video for more details
Step 5 – Create and configure Chatfuel bot
- Now login to your Chatfuel account.
- Create a new Bot from template, Create a Blank Bot
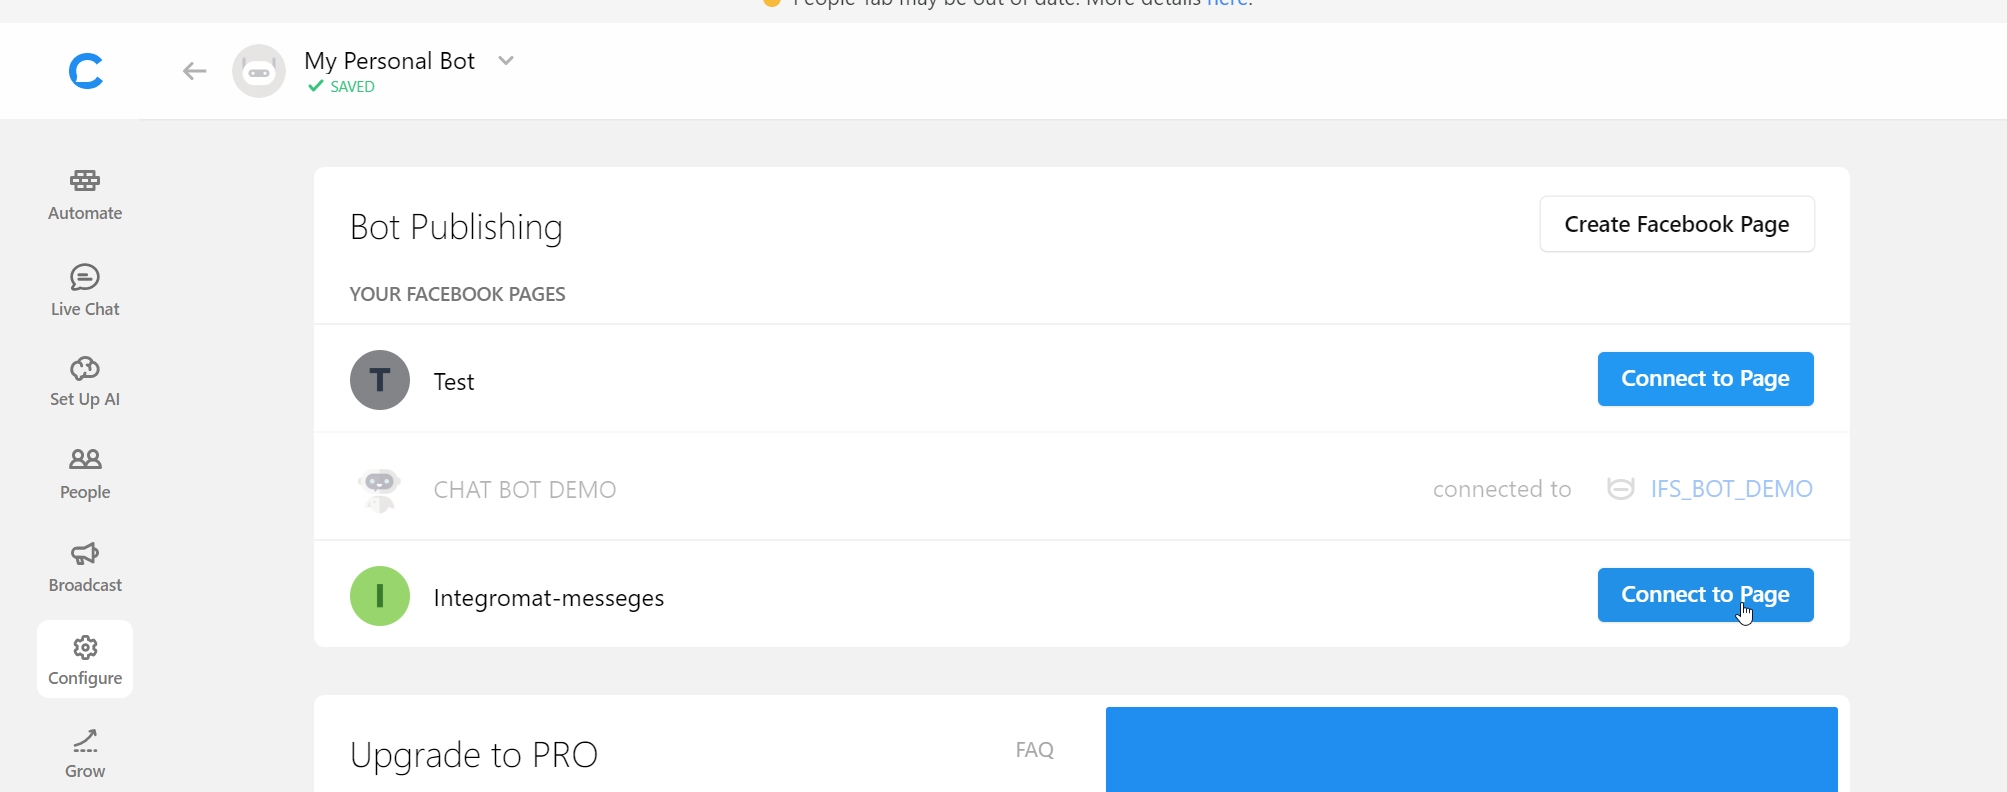
- Open the bot, click on Configure tab. Select the Facebook page you created in Step 4 and Connect
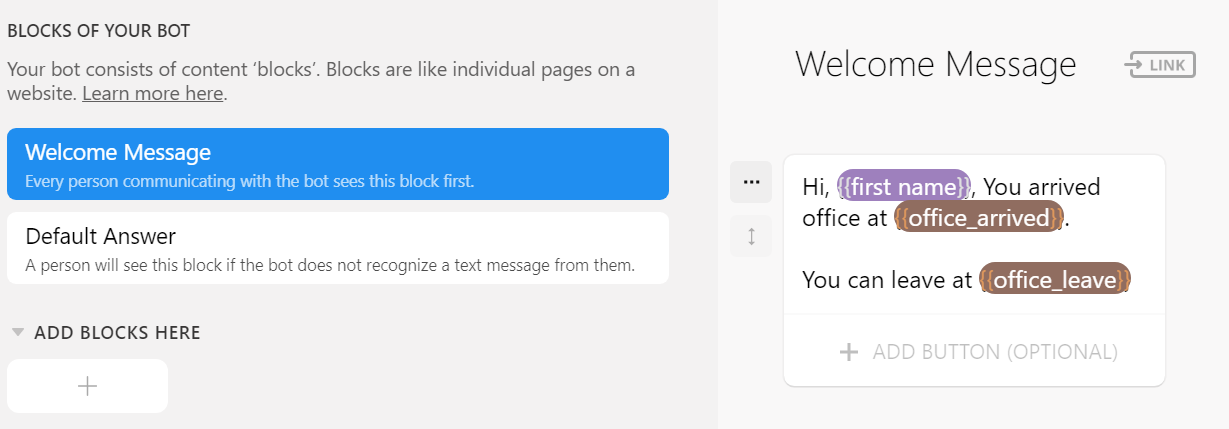
- Now it’s time to configure the message you want to send. Go to the Automate tab and add a new block or modify existing. I’m modifying the default Welcome block as below. Chatfuel provides many different types of message interactions. You can configure the message as you wish.
Chatfuel provides bunch of pre-defined attributes as well as we can define any custom attributes. Here I have defined two custom attributes to show the office arrived time and time I can leave from office.
Step 6 – Configure Integromat Chatfuel module (continuation of step 3)
Now it’s time to configure the Chatfuel Broadcast module we added in Step 3. We need following attributes.
- Bot ID
- Block ID
These two can be obtained from the URL. Click on the block and URL pattern should follow like this
https://dashboard.chatfuel.com/#/bot/[BOT_ID]/structure/[BLOCK_ID]
- Broadcasting API Token
Broadcasting API Token can be found in Configure tab of Chatfuel Bot
- Messenger User ID of the recipient
There are several ways to get the messenger user ID using Messenger API but easiest way is to get it from the Chatfuel itself. To do that, Open Messenger and search for Facebook page you just created for Chatfuel. Send any message.
Now go to People tab in Chatfuel bot. You will see everyone who interacted with the bot. Click on your name and scroll down to find the Messenger User ID attribute.
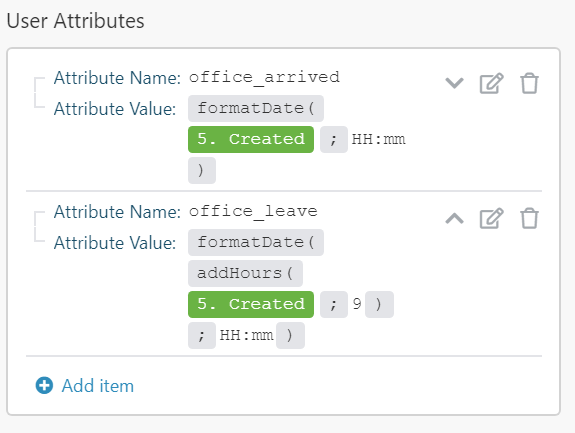
Finally, we need to set the Chatfuel attributes added in step 5.
- office_arrived – Time entered to the Office geofence area
- office_leave – office_arrived + 9 hrs
I’ve used date/time functions available in Integromat to format the attribute values as below
Enjoy!…
Now we are finished our Integromat scenario. Go to Scenarios and switch it ON. Once you reach the office next day, you’ll get a message from your personal assistant 🤖.
Voilà!
It is really easy and fun to work with Integromat and with some clever thinking you can create more interesting scenarios combining several modules.
